How to Lace New Balance 574
Your New Balance 574s look great until the laces hang loose or feel too tight around your instep. Knowing exactly how to lace New Balance 574 models transforms that awkward fit into a secure, stylish foundation for your day.
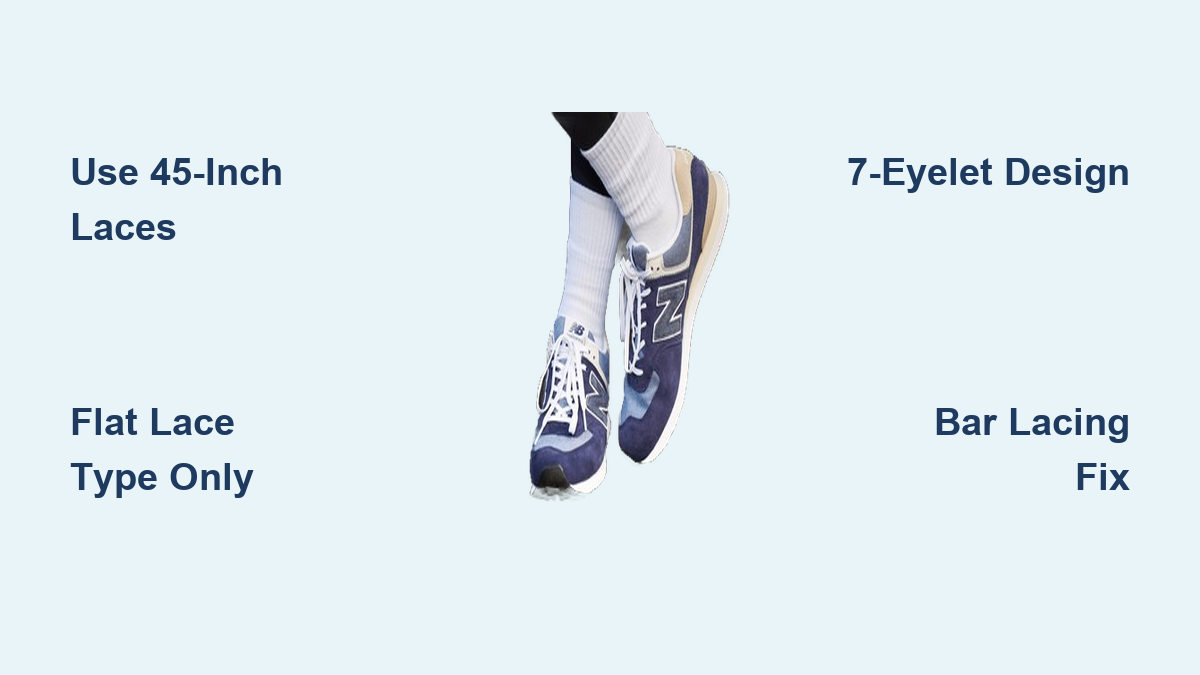
This guide reveals the precise 45-inch flat lace requirement and walks you through three distinct lacing patterns tailored to the shoe’s unique 7-eyelet design. You will learn to execute standard, bar, and ladder styles while avoiding common length and tension mistakes.
Verify Your New Balance 574 Lace Specifications
Success starts with matching the original hardware specs before you thread a single eyelet. Using the wrong dimensions leads to awkward loops or an inability to reach the top holes.
Confirm Length and Shape Requirements
The factory specification demands 45-inch (114cm) flat laces to properly accommodate the shoe’s structure. This specific length ensures you can reach the seventh eyelet and still tie a secure bow without excess bulk.
- Length: Select 45 inches or 114cm exactly
- Shape: Choose flat laces to match the wide eyelet channels
- Category: Look for the “Large” size label when shopping
Pro Tip: Avoid “Medium” laces designed for 5 or 6 eyelet shoes as they will fall short on the 574 model.
Understand the 7-Eyelet Configuration
Your shoe features 7 pairs of eyelets, which creates an odd-numbered setup that affects certain lacing patterns. This specific count allows for versatile styling but requires attention to detail when executing straight bar methods.
- Standard crisscross works perfectly with stock length
- Decorative patterns may consume more lace material
- Odd eyelet counts require internal adjustments for straight lines
Execute Standard Criss-Cross Lacing

This default method offers the most balanced tension and is ideal for daily wear. It utilizes the full 45-inch length efficiently while keeping the shoe secure.
Thread the Bottom Eyelets
Insert both lace ends upward from the outside through the bottom pair of eyelets. Pull the ends until they are even, leaving equal lengths hanging over the tongue on both sides.
You now have two free ends ready to cross over the foot.
Cross and Feed Upward Through Eyelets
Take the left end and cross it over the right side, then thread it downward from the inside into the next higher right-side eyelet. Repeat this motion with the right end, crossing over to the left side and feeding it downward from the inside.
- Ensure each crossover forms a clean “X” over the tongue
- Keep the lace running straight under the eyelet row
- Maintain consistent tension to prevent loose spots
Complete the Pattern to the Top
Continue alternating sides by crossing over the tongue and feeding into the next set of eyelets from the inside out. Repeat this process until you reach the seventh and final pair of eyelets at the top.
Thread both ends through the top eyelets from the outside in, then tie your standard bow knot.
Time Estimate: 60 seconds
Difficulty: Easy
Best For: Everyday reliability and secure fit
Apply Straight Bar Lacing for Clean Lines

Bar lacing removes visible crosses for a minimalist look that reduces pressure on the instep. This style is excellent for high arches or those who prefer a sleek aesthetic.
Prepare the Initial Bar Pattern
Start by threading the lace upward from the inside through the bottom-left eyelet. Pull most of the lace to the right side, leaving just enough length on the left for the final steps.
Run the long end straight across the top to the bottom-right eyelet and thread it downward from the outside to create your first horizontal bar.
Create Horizontal Bars Up the Shoe
Bring the right end upward from the inside through the second-right eyelet. Run it straight across to the second-left eyelet and thread it downward from the outside to form the next bar.
Repeat this pattern:
* Left end up through the third-left eyelet
* Across to third-right and down from outside
* Up through fourth-left and across to fourth-right
Adjust for the Seventh Eyelet
Since the 574 has an odd number of eyelet pairs, you must switch techniques near the top. At the fifth pair, run the lace upward internally under the tongue from fifth-right to sixth-left instead of crossing.
- Go straight across to sixth-right and thread down
- Jump internally again from sixth-right to seventh-left
- Cross to seventh-right, thread down, and tie the bow
Why This Works: Internal vertical jumps compensate for the odd eyelet count while keeping external bars straight.
Build Ladder Lacing for Decorative Style
Ladder lacing creates a bold, interlocking pattern that stands out visually. This method uses more lace length, so strict adherence to the 45-inch spec is vital.
Begin at the Bottom Row
Thread the lace upward from the outside through the bottom-left eyelet. Run it straight across and downward from the outside into the bottom-right eyelet.
Take the right end and run it upward from the inside through the second-right eyelet to begin the vertical climb.
Construct the Ladder Rungs
Bring the right end straight across to the second-left eyelet and thread it downward from the outside. Now run it upward from the inside through the third-left eyelet.
Repeat this sequence:
* Across to third-right and down
* Up through fourth-right
* Across to fourth-left and down
* Up through fifth-left
Finish the Top Section
Continue the pattern of inside up, across, down, up next until you reach the top eyelets. The result looks like a ladder climbing up the center of your shoe.
At the seventh eyelet, thread both ends through and tie your knot securely.
Pro Tip: This method consumes extra length, so ensure your laces are true 45-inch flat styles.
Fix Common Lacing Mistakes
Small errors in technique can ruin both the fit and appearance of your sneakers. Identifying these issues early saves time and improves comfort.
Correct Uneven Tension Issues
If one side feels tighter, you likely pulled harder on one end during lacing. Untie the shoe and re-lace slowly, pulling both sides equally after every crossover point.
- Test the fit before tying the final knot
- Uneven tension causes heel slippage or pressure points
- Reset completely if the shoe feels unbalanced
Address Length Problems
Using 40-inch laces on a 7-eyelet shoe leaves you unable to reach the top. Conversely, 54-inch laces create bulky bows that look messy.
- Too short: Upgrade immediately to 45-inch “Large” laces
- Too long: Use the “loop, swoop, and pull” method to hide excess
- Alternative: Switch to elastic laces with a cinch lock for adjustability
Avoid Skipping Eyelets
Never skip eyelets unless medically necessary for pressure relief. Skipping reduces structural support and increases wear on the upper material of your 574s.
If you must skip, use ladder lacing to bridge gaps cleanly without compromising stability.
Replace Laces Like a Professional
Over time, laces fray or discolor, and replacing them revitalizes your entire pair. Follow these steps to ensure a perfect refresh.
Remove Old Laces and Clean
Unlace the shoes completely and use a key or lace tool to clear tight eyelets if needed. Clean the eyelet channels with a dry toothbrush to remove dirt buildup before inserting new laces.
Choose Your Replacement Style
Stick to 45-inch flat laces in the “Large” category for compatibility. You can now customize based on your preferences:
- Colors: Match the upper or choose a contrasting hue
- Materials: Waxed cotton for shine or nylon for durability
- Function: Reflective for night visibility or elastic for slip-on ease
OEM vs Aftermarket: Original laces offer a perfect fit, while aftermarket options provide style freedom if dimensions match.
Re-Thread and Test Fit
Use the standard criss-cross method to re-lace the shoes initially. Walk around briefly to test tightness and adjust per zone.
- Lower eyelets: Keep snug for forefoot control
- Mid eyelets: Maintain moderate tension for flexibility
- Top eyelets: Leave slightly loose if you have wide feet
Prevent Lace Wear and Tear
Extending the life of your laces starts with how you treat them daily. Simple habits prevent premature fraying and breakage.
Rotate and Clean Properly
Own two sets of laces? Swap them weekly to reduce strain on individual fibers. Never toss laced shoes in the washer, as water and agitation weaken the material.
Instead, remove laces and hand wash with mild soap, then air dry away from direct heat sources.
Maintain Frayed Ends
If tips begin to unravel, seal them with clear nail polish or a careful touch of flame. Do not cut the ends unless absolutely necessary, as shortening ruins the 45-inch fit required for the 574.
- Trim only as a last resort
- Sealing prevents further unraveling
- Proper care extends lace life significantly
Frequently Asked Questions About New Balance 574 Lacing
What size laces do I need for New Balance 574?
You need 45-inch (114cm) flat laces categorized as “Large.” This specific length accommodates the 7-eyelet design with enough excess to tie a secure bow knot comfortably.
Can I use round laces on my New Balance 574?
While possible, round laces alter the intended look and may not hold tension as well in the wide eyelets. Flat laces are engineered to distribute pressure evenly and stay tied more securely on this model.
Why does my bar lacing look uneven on the 574?
The New Balance 574 has 7 pairs of eyelets, an odd number that requires internal adjustments. You must run one lace end vertically under the tongue at specific points to keep the external bars straight and aligned.
How do I stop my laces from coming untied?
Ensure you are using flat laces rather than round ones, as the increased surface area creates more friction. Additionally, pull both sides equally during lacing to maintain even tension throughout the shoe.
Can I use shorter laces for a cleaner look?
No, using laces shorter than 45 inches will prevent you from reaching the top eyelets on the 7-eyelet 574 design. Stick to the Large size classification to ensure proper function and fit.
Key Takeaways for Lacing Your New Balance 574
Mastering how to lace New Balance 574 sneakers requires respecting their unique 7-eyelet design and 45-inch flat lace requirement. Whether you choose the reliable standard criss-cross, the sleek straight bar, or the bold ladder style, using the correct “Large” size laces ensures a secure fit and sharp appearance.
Avoid common pitfalls like uneven tension or incorrect lengths by verifying your specs before starting. Now that you understand the mechanics, grab your laces and experiment with these techniques to customize your fit and style today.