Best Ways to Lace Jordan 1 (2026 Guide)
Your Air Jordan 1s might look messy or feel tight simply because the laces are wrong. Finding the best way to lace Jordan 1 sneakers transforms their fit, prevents ugly toe creases, and upgrades your entire outfit instantly.
This guide details five expert-approved methods ranging from factory-clean classics to secure heel locks. You will learn exact steps for each style, required lace lengths, and how to fix common errors like uneven ends or twisted flats.
Select the Right Jordan 1 Lacing Method for Your Needs

Choosing a lacing pattern depends entirely on whether you prioritize comfort, ankle support, or visual flair. Each technique offers unique benefits that alter how the shoe fits and looks on your foot.
Match the Technique to Your Goal
- Classic Lacing: Delivers balanced support and a timeless look for daily wear.
- Loose Lacing: Reduces pressure on wide feet and minimizes leather creasing.
- Bar Lacing: Creates a minimalist horizontal bar effect for clean aesthetics.
- Loop-Back Lacing: Adds decorative chain-like texture for streetwear statements.
- Heel-Lock Lacing: Secures the heel firmly to prevent slippage during activity.
Verify Your Lace Length Requirements
Using the correct lace length is critical for these styles to work properly without falling short.
* Men’s Sizes: Require 72-inch laces, especially for Loose and Bar styles that consume extra material.
* Women’s Sizes: Typically need 63-inch laces for standard coverage.
* Preparation: Ensure laces lie completely flat before starting, as twists ruin symmetry and cause uneven tension.
Execute Classic Lacing for a Factory-Fresh Look
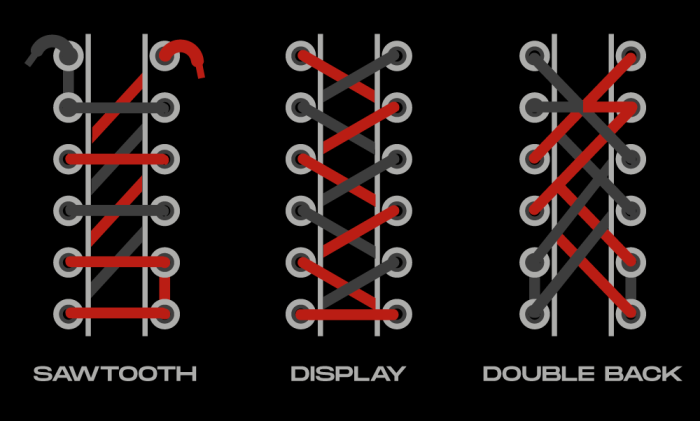
The classic criss-cross method replicates the original factory style found on new boxes. It provides even tension distribution and works perfectly for everyday activities.
Step-by-Step Classic Execution
- Insert both lace ends from the outside in through the bottom eyelets and pull them equal.
- Cross the left lace under the tongue and thread it up through the second right eyelet.
- Cross the right lace under the tongue and thread it up through the second left eyelet.
- Continue alternating diagonally upward while keeping each segment flat beneath the eyelet.
- Tie a standard bow at the top or tuck loose ends under the tongue for a hidden finish.
Expert Tips for Classic Styling
- Prevent Creasing: Gently tug the tongue upward after lacing to release excess tension before tying your knot.
- Hidden Knots: If your laces are long enough, tucking the bow under the tongue creates a seamless profile ideal for photos.
Apply Loose Lacing to Prevent Toe Box Creases

Loose lacing is the best way to lace Jordan 1 shoes if you want to preserve the leather condition. This method reduces downward pressure on the toe box to stop unsightly wrinkles from forming.
Why This Method Protects Leather
Threading laces from outside in creates angled bars that keep tension off the upper material. The result is a relaxed silhouette that feels comfortable on wide feet and looks fresh longer.
How to Create the Loose Fit
- Thread both ends from outside in through the bottom eyelets to form a straight horizontal bar.
- Feed each lace end into the opposite eyelet directly above to create angled bars up the middle.
- Pass the right lace through the tongue slit from right to left, then thread it into the left eyelet.
- Mirror this with the left lace through the slit and into the right eyelet.
- Manually loosen the entire structure from top to bottom with your fingers for maximum comfort.
Critical Length Warning
This technique consumes significant lace length due to the relaxed threading path. You must use 72-inch laces to ensure you have enough material to tie or tuck the ends securely.
Achieve a Minimalist Aesthetic with Bar Lacing

Bar lacing hides all diagonal crosses underneath the tongue to display clean horizontal lines across the top. This style is a favorite for fashion-forward outfits and showcasing tongue logos.
Steps for Clean Horizontal Bars
- Thread both ends from inside out through the bottom eyelets and center the lace.
- Push the right lace up through the second right eyelet and cross it down through the second left eyelet.
- Pull the right lace under the vertical bar and up through the fourth left eyelet, skipping the third.
- Thread the left lace up through the third left eyelet and cross it down through the third right eyelet.
- Repeat this skip pattern until you reach the top, leaving the final two eyelets empty.
Finish with a Factory Knot
- Wrap both lace ends around your index and middle fingers in an overhand direction.
- Cross them over the wrap and pinch underneath your thumb to create a compact knot.
- Tuck this knot securely under the tongue for a professional, invisible finish.
Style Considerations
- This method works best with 72-inch laces to accommodate the weaving pattern.
- Avoid this style if you need maximum ankle support since the top eyelets remain unused.
- The clean lines make the tongue logo the primary focal point of the shoe.
Add Visual Flair with Loop-Back Lacing
Loop-back lacing creates a distinctive chain-link effect along the side of your Jordan 1s. It is an excellent choice for making a bold streetwear statement or adding texture to a simple outfit.
Building the Decorative Chain
- Thread both lace ends downward through the bottom eyelets from outside to inside.
- Cross the right lace over the left to form an X shape near the eyelets.
- Twist the right lace clockwise behind the left until it returns to the right side.
- Pull both laces downward tightly to form a distinct loop before moving up.
- Push each lace end up through the next available eyelet on its respective side.
- Repeat the crossing, wrapping, and pulling process all the way to the top.
Finishing Options for Loop-Back
- Tie the remaining ends in a standard bow for a secure hold.
- Tuck the ends under the tongue for a cleaner appearance.
- Leave the ends hanging loosely for a rugged, undone streetwear vibe.
Potential Drawbacks to Consider
- Twisted Laces: You must keep laces flat at every step or the chain effect looks messy.
- Added Bulk: The multiple layers add thickness that might feel snug on wide feet.
- Time Investment: This complex pattern takes longer to execute than classic lacing.
Secure Your Heel with Heel-Lock Lacing

Heel-lock lacing transforms your Jordan 1s into performance-ready footwear by eliminating heel slippage. This method is essential for walking long distances or if you have narrow heels.
How to Create the Runner’s Loop
- Lace the shoe using the classic criss-cross method up to the second-to-last eyelet.
- Thread the right lace up through the top right eyelet but leave a small finger-sized loop.
- Repeat on the left side by threading up through the top left eyelet to create a matching loop.
- Feed the right lace end through the left loop and the left lace end through the right loop.
- Pull both ends tight to cinch the loops and lock your heel in place before tying a bow.
Benefits of the Lockdown
- Eliminates heel slippage effectively during movement.
- Prevents blisters caused by friction from foot sliding.
- Enhances ankle stability, which is particularly useful in high-top models.
Note: This method requires functional top eyelets, so do not use it if they are damaged or blocked.
Compare Lacing Styles to Find Your Perfect Match
Use this comparison to quickly decide which method suits your specific needs for comfort, style, or support.
| Lacing Style | Best For | Lace Length | Top Eyelets Used? | Visual Effect |
|---|---|---|---|---|
| Classic | Everyday wear | 48–54″ | Yes | Clean, standard |
| Loose | Crease prevention | 72″ | Yes | Relaxed, angled bars |
| Bar | Minimalist look | 72″ | No | Horizontal bars |
| Loop-Back | Fashion statement | 72″ | Yes | Chain-like texture |
| Heel-Lock | Heel security | 48–54″ | Yes | Functional loops at top |
Fix Common Lacing Mistakes Quickly
Even small errors can ruin the look and feel of your sneakers, so knowing how to troubleshoot is essential.
Correcting Uneven Lace Lengths
- Cause: Starting with misaligned ends or pulling one side tighter than the other.
- Fix: Restart the process and pull both ends through the bottom eyelets until they are perfectly even.
Removing Permanent Twists
- Cause: Rotating the lace while threading or failing to flatten it before pulling.
- Fix: Undo the last step, rotate the lace 180 degrees, and re-thread while ensuring it lies flat.
Resolving Tightness Issues
- Cause: Over-pulling during the lacing process creates excessive tension.
- Fix: Tug the tongue upward after lacing to distribute slack or manually loosen from top to bottom.
Stopping Heel Slippage
- Cause: Using standard lacing on narrow heels or high-volume feet.
- Fix: Switch immediately to Heel-Lock lacing to utilize the top eyelets for anchoring.
Maintain Your Sneaker Appearance Long Term
Proper lacing is a crucial part of sneaker care that extends the life of your Jordan 1s.
Preventing Toe-Box Creasing
- Use Loose lacing to reduce downward pressure on the leather.
- Avoid over-tightening laces in any style to maintain material integrity.
- Consider using shoe trees when not wearing them to hold the shape.
Protecting Eyelets and Laces
- Do not yank laces violently as this can damage eyelet stitching over time.
- Use gentle force when threading, especially in tight patterns like Bar or Loop-Back.
- Rotate between different lace styles to prevent wear集中在 one specific area.
Frequently Asked Questions About Jordan 1 Lacing
What is the best lacing style for wide feet?
Loose lacing is the top choice for wide feet because it reduces pressure on the upper leather. This method creates a relaxed fit that accommodates wider foot shapes without causing discomfort.
How long should my Jordan 1 laces be?
Men typically need 72-inch laces while women usually require 63-inch laces. Longer laces are essential for Loose and Bar styles that consume more material during threading.
Which lacing method prevents toe creases most effectively?
Loose lacing is specifically designed to minimize toe box creasing by reducing downward tension. Keeping laces slightly relaxed in any style also helps preserve the leather condition.
Can I use heel-lock lacing on Jordan 1 Lows?
Yes, you can use heel-lock lacing on Low, Mid, and High models as long as they have functional top eyelets. The method works by utilizing the highest pair of eyelets to secure the heel.
Why do my laces keep twisting no matter what I do?
Twists occur when you rotate the lace while threading or fail to flatten it before pulling tight. Always check that the lace lies flat against the shoe before proceeding to the next eyelet.
Key Takeaways for Lacing Your Jordan 1s
Finding the best way to lace Jordan 1 sneakers depends on your specific goals for comfort, style, and function. Whether you choose Classic for reliability, Loose for crease prevention, or Heel-Lock for security, proper technique makes all the difference.
Start by selecting the right lace length and ensuring your laces remain flat throughout the process. Experiment with these five proven methods to discover which one elevates your sneaker game the most.