How to Lace High Top Vans
Tired of loose laces ruining your skate session or a sloppy look killing your street style? Learning how to lace high top Vans properly solves fit issues while unlocking cleaner lines and better ankle support. Most people ignore the tongue loop or misuse the top eyelets, leading to discomfort and a messy silhouette.
This guide reveals the exact steps for the iconic Sk8-Hi crisscross, sleek straight bars, and no-tie zipper techniques. You will discover how to secure your heel, hide knots behind the tongue, and customize tension for skating or casual wear.
Execute the Standard Sk8-Hi Lacing Method

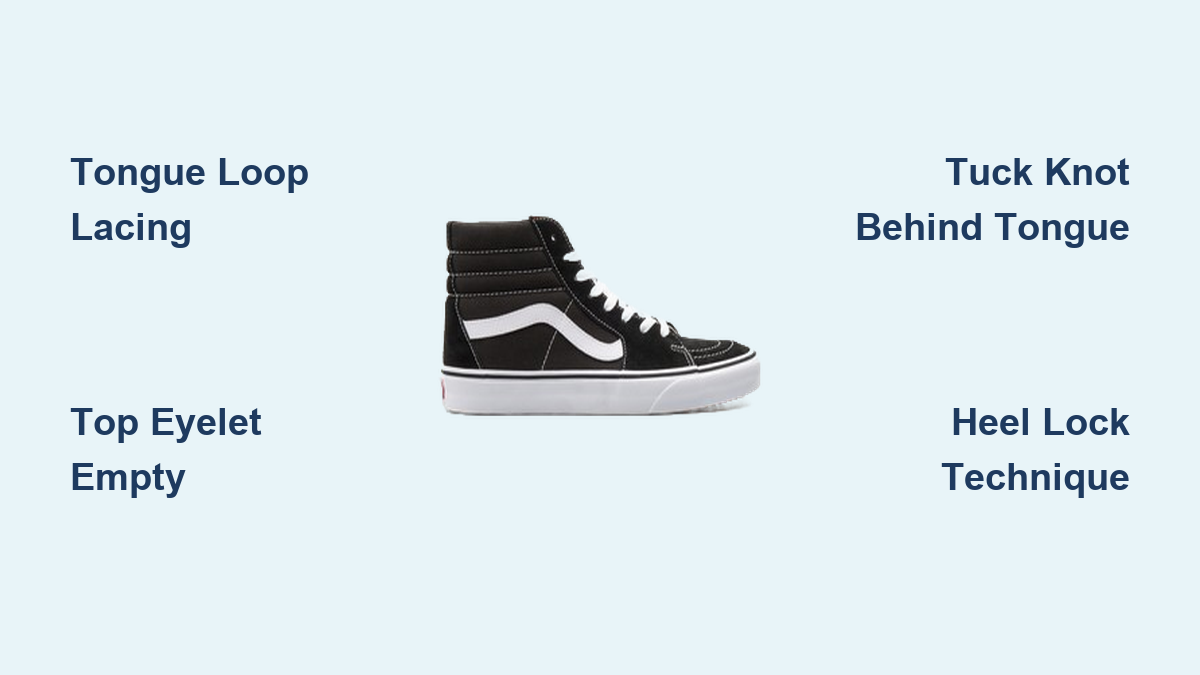
The signature Vans aesthetic relies on a specific crisscross pattern that integrates the tongue loop for stability. This method prevents the tongue from sliding sideways while keeping the ankle area relaxed.
Thread Through the Tongue Loop Correctly
Start by threading both lace ends down through the second eyelet from the bottom, entering from the outside. As you move upward, locate the small fabric loop in the center of the tongue.
- Take one lace end and thread it through the tongue loop from left to right.
- Pull that same end down into the next available eyelet on its side.
- Repeat the process with the other lace end through the same loop.
Keeping the laces flat inside the loop prevents bunching and maintains the authentic shape. Skipping this step often results in a crooked tongue and uneven pressure.
Leave the Top Eyelet Empty
A defining rule of the standard Sk8-Hi style is leaving the very top eyelet unused. Stop your lacing one row below the highest pair of holes regardless of how many eyelets your shoe has.
This technique preserves the classic high-top balance and prevents the collar from cutting into your ankle. It also allows the shoe to maintain its intended relaxed posture rather than looking overly tight.
Tuck the Knot Behind the Tongue
Avoid tying a bulky bow on the front of the shoe. Instead, tie a loose square knot and tuck it securely behind the tongue.
This keeps the front profile sleek and protects the knot from wear during activities. If your laces are long, wrap the ends once around the ankle area inside the shoe before tucking to prevent bulging.
Create Clean Lines with Straight Bar Lacing

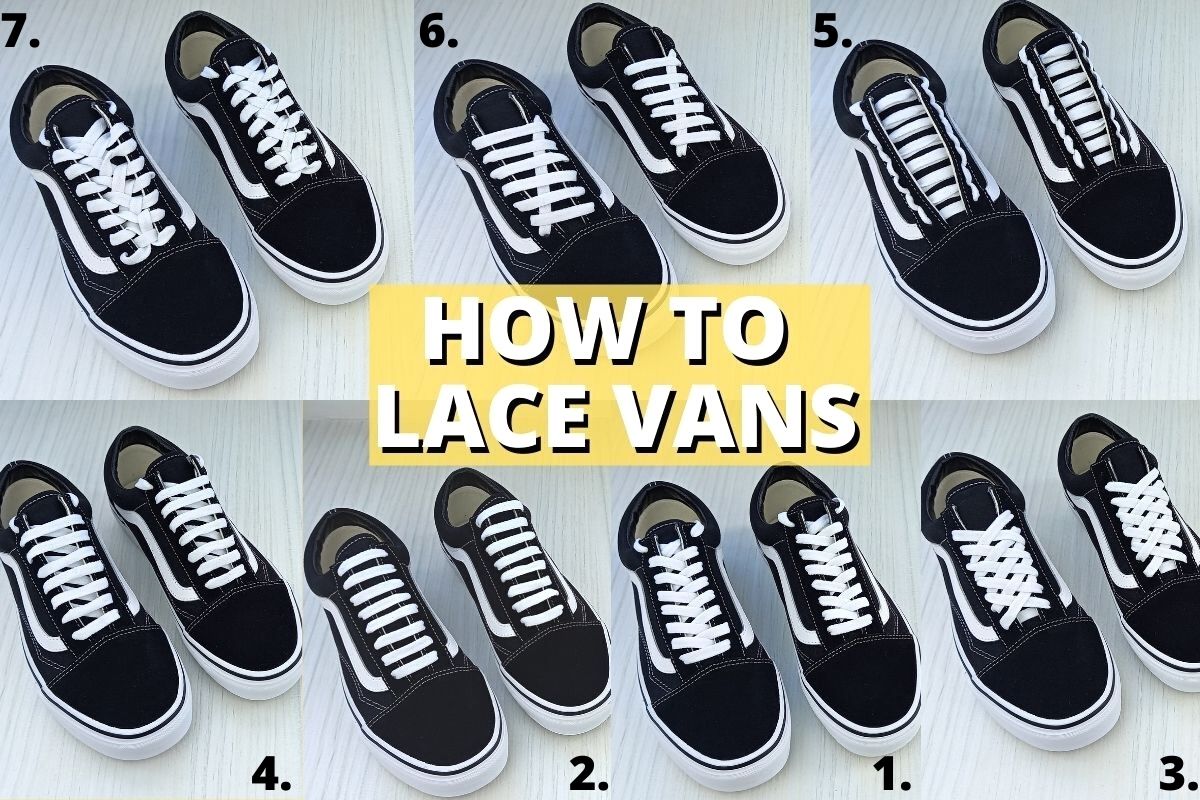
Straight bar lacing replaces diagonal crosses with horizontal lines for a minimalist, factory-fresh appearance. This style works exceptionally well on canvas or leather panels where you want to show off the material.
Form Parallel Horizontal Bars
Begin by threading the lace from the inside out through the bottom left eyelet. Bring it across the front and insert it from the outside in through the bottom right eyelet.
- Take the right-side lace and feed it up through the third eyelet on the same side, skipping the second hole.
- Cross it over and thread it down into the third eyelet on the left side.
- Take the left-side lace and bring it up through the second eyelet, then cross it down into the second eyelet on the right.
This alternating skip-and-bar pattern creates flat, parallel lines with no visible diagonal crosses. Ensure you pull evenly to keep the bars straight.
Keep Top Two Eyelets Open
Unlike other methods, straight bar lacing requires leaving the top two eyelets empty. This configuration allows the tongue to rise fully and keeps the Vans logo visible when pulled up.
Leaving these holes open also reduces pressure on the instep and maintains the natural flex of the shoe upper. It ensures the laces do not restrict movement near the ankle collar.
Secure With a Factory Knot
Since the laces do not meet at the top for a traditional bow, use a factory knot to secure them. Make a loop with one end, pass the other end through, and pull tight.
Tuck this knot behind the tongue to prevent fraying and keep it hidden. This knot stays secure without a bow and resists loosening during daily wear or light activity.
Apply Classic Crisscross Lacing Techniques
The classic crisscross method remains the go-to choice for Old Skools and Authentic high-tops due to its even pressure distribution. It delivers a timeless look that works for any occasion when done with precision.
Establish a Symmetrical Base
Thread each lace end up from the inside through the bottom eyelets to form a horizontal bar. Pull both sides until they are exactly equal in length before starting the crosses.
Uneven laces at the start lead to crooked crosses and a messy front appearance. Check your lengths frequently as you move up the shoe to maintain balance.
Cross Over Without Twisting
Take the right lace and pass it over the tongue into the next left eyelet, going downward. Repeat with the left lace into the right eyelet, ensuring the laces lie completely flat.
- Avoid letting the lace twist as it crosses the tongue.
- Each cross should sit smoothly without kinks or bumps.
- Maintain consistent tension on every pull to ensure uniform spacing.
Twisted laces ruin the visual flow and can cause uneven wear on the fabric over time.
Mirror the Pattern on the Second Shoe
One lace will always sit on top of the other in a crisscross pattern. To make your pair look matched, reverse the starting side on the second shoe.
If the right lace was over on the left shoe, start with the left lace over on the right shoe. This creates symmetrical overlap when you stand and gives your footwear a professional, intentional look.
Master the No-Tie Zipper Lacing Technique
Zipper lacing creates a spiral effect that locks the shoe in place without requiring a bow. This method is ideal for skating or biking where loose laces pose a safety hazard.
Anchor One End Securely
Tie a secure knot at one end of the lace that is large enough to prevent it from pulling through any eyelet. This knot stays inside the shoe and acts as a fixed anchor point for the rest of the pattern.
Ensure the knot is tight and positioned so it does not interfere with the interior comfort of the shoe. This anchor allows you to pull the rest of the lace tight without slippage.
Follow the Spiral Zipper Pattern
Thread the free end up through the bottom right eyelet from the inside out. Cross it over and thread it down into the bottom left eyelet from the outside in.
- Bring the lace under the eyelet strip on the right side.
- Feed it up through the second-bottom right eyelet.
- Cross it down into the second-bottom left eyelet.
Repeat this under, up, over, and down motion to create a diagonal zipper that hugs the foot. The pattern creates significant friction to hold the shoe tight.
Tuck the Loose End Inside
Once you reach the top, pull the lace snug and tuck the end inside the shoe. No tying is needed because the tension and spiral pattern hold everything in place.
The resulting flat profile will not catch on skateboards or bicycle pedals. This makes it a highly functional choice for active users who need reliability.
Lock Your Heel With Specialized Lacing
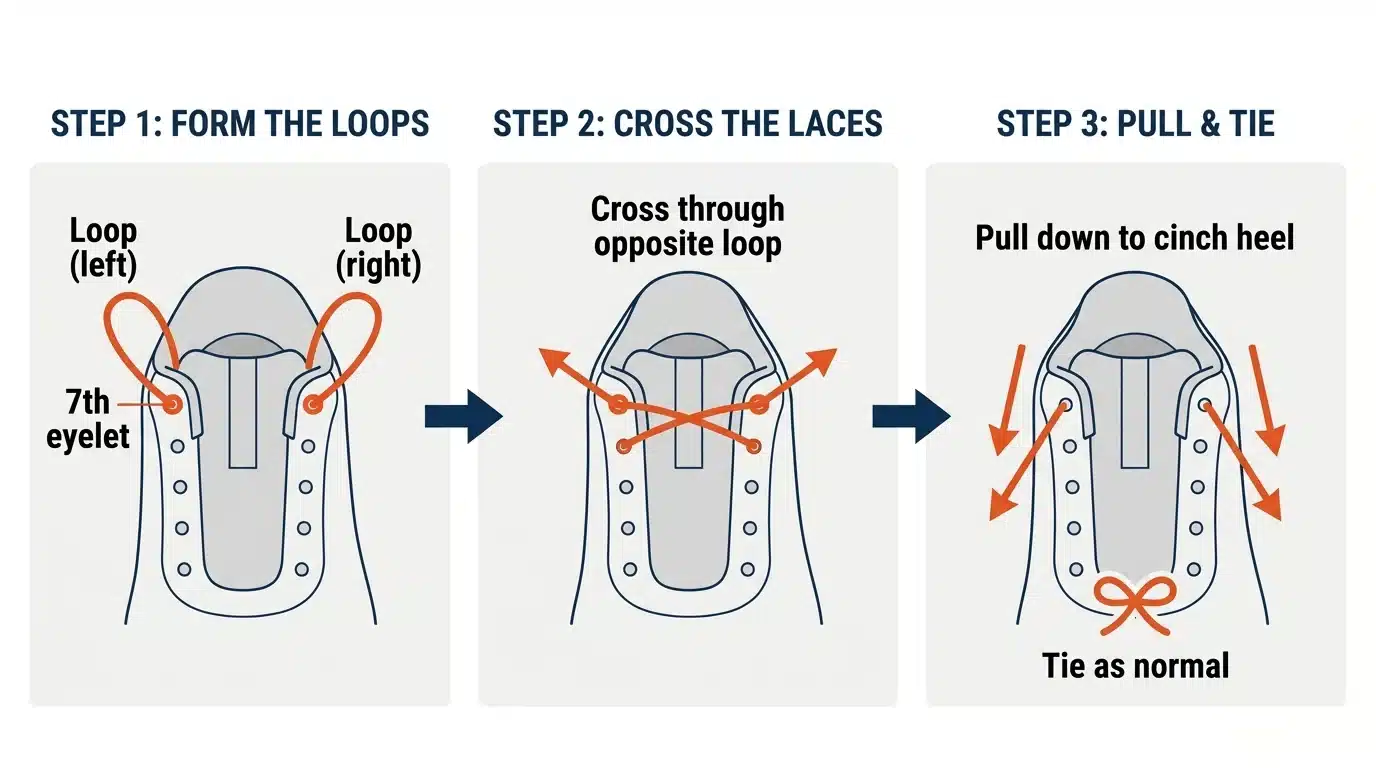
Heel lock lacing utilizes the top eyelets that most people ignore to prevent slippage. This method is essential if your heel lifts while skating or walking.
Utilize the Top Eyelets for Loops
Lace all the way up using your preferred method until you reach the top eyelets. Instead of crossing immediately, pull each lace straight up through the top eyelet on its own side to form a loop.
- Pass the right lace end through the left loop.
- Pass the left lace end through the right loop.
- Pull tight and tie as usual.
This creates a lockdown strap over the ankle collar that prevents lift and improves responsiveness. It is a game-changer for high-impact activities.
Customize Fit and Maintain Your Laces
Your lacing choice should match your specific activity and aesthetic preferences. Small adjustments can significantly improve comfort and longevity.
Adjust Tension for Comfort
Choose your pattern based on whether you need a snug or roomy fit. Straight bar and heel lock methods provide full-foot contact for a tight feel.
- Skip the top two or three eyelets for a roomier feel.
- Use zigzag lacing to relieve pressure on sensitive instep areas.
- Rotate lacing styles weekly to spread wear across different eyelets.
Vans laces are made of 100% polyester, making them durable, but varying the pressure points extends their life.
Prevent Twists and Wear
Check your laces as you thread them because a twisted lace ruins the overall look. If you notice bunching at the tongue loop, re-lace that section to ensure it lies flat.
Clean your laces with mild soap every few weeks to remove dirt that accelerates wear. When swapping styles, lay laces flat or coil them loosely to avoid setting creases that lead to weak spots.
Frequently Asked Questions About Lacing High Top Vans
Should I use the top eyelet on my Sk8-Hi Vans?
For the standard Sk8-Hi look, you should leave the very top eyelet empty. This maintains the classic silhouette and prevents ankle restriction, though you can use it for heel lock lacing if you need extra stability.
How do I keep my Vans laces from coming undone?
Tuck your knot behind the tongue or use a factory knot for bar lacing. For active use, try the zipper lacing method which relies on friction and tucking rather than a traditional bow.
What is the best lacing style for skating?
Zipper lacing and hidden lacing are best for skating because they eliminate loose ends that could get caught in wheels. Heel lock lacing is also recommended to prevent your foot from sliding inside the shoe.
Can I use colored laces with these methods?
Yes, you can swap standard black or white laces for colored, checkerboard, or patterned options. Different colors highlight specific patterns like straight bars or the double helix for a custom look.
Why do my laces keep twisting when I lace my shoes?
Twisting often happens if you do not pull the lace flat after each cross. Stop immediately to straighten the lace before proceeding, and ensure you are not rotating your wrist as you thread the eyelets.
Key Takeaways for Lacing High Top Vans
Mastering how to lace high top Vans transforms both the style and function of your footwear. Whether you choose the standard Sk8-Hi method with its tongue loop or the secure zipper technique for skating, the right pattern enhances fit and durability.
Remember to leave the top eyelet empty for the classic look, tuck knots behind the tongue for a clean finish, and rotate your lacing styles to extend lace life. Start with the standard method today and experiment with straight bars or heel locks to find your perfect match.