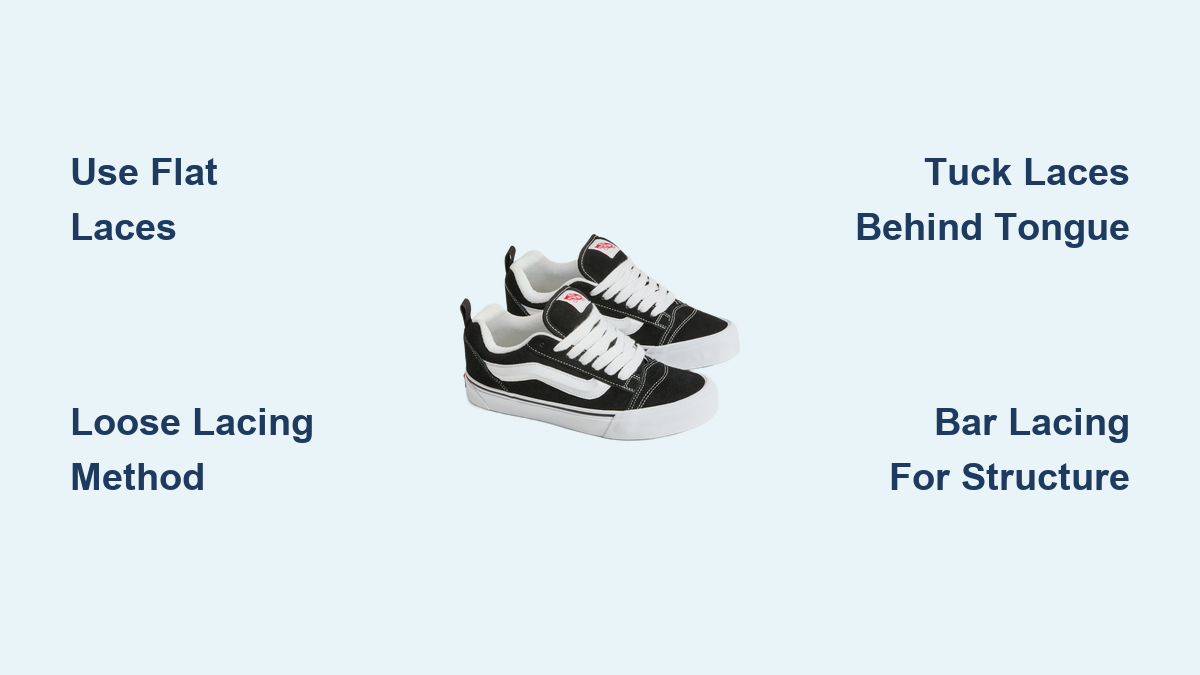
How to Lace Chunky Vans: Quick Steps
Struggling with bulky knots or a tight fit on your chunky Vans ruins the iconic 90s silhouette these shoes are meant to showcase. Models like the Knu Skool and New Skool feature oversized tongues and padded collars that demand a unique approach rather than standard sneaker tying.
This guide reveals exactly how to lace chunky Vans using three proven methods designed for maximum comfort and style. You will learn to create a slip-on ready fit, achieve clean horizontal bars, or weave bold diamond patterns while keeping your laces flat and hidden.
Choose the Right Lacing Style for Your Vans
Selecting the correct technique depends entirely on your desired aesthetic and how you plan to wear the shoe. The method you choose dictates whether your shoes function as easy slip-ons or structured statement pieces.
Match Method to Aesthetic Goal
- Loose Lacing: Best for a relaxed, streetwear look that allows you to slide shoes on without untying.
- Bar Lacing: Creates a sharp, horizontal pattern ideal for a polished and symmetrical finish.
- Diamond Lacing: Adds a woven, geometric texture for those wanting a bold and custom design.
Prepare Flat Laces and Shoe Tongue
Proper preparation ensures your laces lay flat against the wide tongue and do not create unnecessary bulk. Skipping this step often leads to uneven tension and a messy appearance.
Use Flat Laces Only
Always start with flat laces instead of round ones to ensure a smooth profile. Round laces create bulk that clashes with the wide tongue of chunky Vans. If your new laces have curls from packaging, gently pull them straight or warm them with your hands to flatten before starting.
Push Tongue Down First
Push the padded tongue fully down into the shoe before threading any lace. This exposes all eyelets clearly and gives you unobstructed access to both sides. Hold both lace ends together and pull them upward through the shoe to confirm they are even in length before beginning your pattern.
Execute the Loose Lacing Method

This technique is the definitive style for chunky Vans, designed to accommodate the voluminous tongue and provide a relaxed fit. It eliminates the need for tying knots, allowing the shoe to function as a true slip-on.
Start With Bottom Eyelets
Begin by threading both lace ends down through the bottom-most eyelets from the outside in. Pull them through until both sides are equal in length. Keep the tension loose at this stage rather than pulling tight, as the goal is even spacing rather than a snug hold.
Criss-Cross With Intentional Slack
Use an over-under alternating pattern to move up the shoe without tightening the fit.
1. Take the right lace and thread it down through the second left eyelet.
2. Take the left lace and thread it down through the second right eyelet.
3. Repeat this sequence upward, crossing diagonally each time.
Smooth each lace flat with your fingers as you go to avoid twists. Do not pull tight after each cross; leave consistent slack to maintain the signature drape.
Finish With Hidden Loop
At the top eyelets, avoid tying a traditional knot to preserve the slip-on function.
1. Cross the right lace over and thread it up from underneath the final left eyelet.
2. Cross the left lace over and thread it up from underneath the final right eyelet.
3. Pull each end only halfway through, leaving a small loop on each side.
Tuck Laces Under Tongue
Grab both loops or loose ends and pull them behind the tongue completely. Push the tongue back up into its natural, puffed position to lock the laces in place. Slide the lace ends down along the inner sidewalls and tuck them under the tongue’s base so no lace is visible from the front.
Apply Bar Lacing for Clean Lines

Bar lacing offers a sharp, architectural aesthetic with clean horizontal lines that emphasize structure. This method is more complex as it requires skipping eyelets to create the signature “bars.”
Create Horizontal Bars
Start by threading both ends up through the bottom eyelets from above and equalize the length. Skip the second eyelet on one side to begin the pattern.
1. Take the right lace and bring it up from underneath the third right eyelet.
2. Pull it across and thread it down through the third left eyelet to form the first bar.
Fill the Skipped Rows
Use the left lace to fill the gap created by the skip. Bring the left lace up from underneath the second left eyelet. Pull it across and thread it down through the second right eyelet. This creates a second bar sitting directly below the first one.
Repeat Skip-and-Fill Pattern
Continue alternating between skipping and filling to maintain parallel lines. Take the lace that just formed a bar, skip the next eyelet on its side, and bring it up from underneath the one above. Use the other lace to fill the newly skipped row. This creates parallel bars that stay flat and structured up the shoe.
Finish With Tuck or Bow
At the top, you can loosely tie a bow if you need extra hold for activity. For a cleaner look, tuck the ends behind the tongue just like in the loose lacing method. This style works great when you want support without sacrificing the visual appeal.
Build Diamond Lacing for Bold Texture

Diamond lacing creates a bold, woven pattern that highlights the shoe’s lines with a dynamic and textured look. This decorative style is best for users wanting a customized and high-impact appearance.
Start With Criss-Cross Base
Begin by threading one lace end down through the bottom right eyelet. Thread the other end up through the bottom left eyelet. Pull both ends evenly to establish a balanced foundation for the pattern.
Skip and Loop to Form Diamonds
Create the first diamond shape by skipping an eyelet and looping back.
1. Take the right lace and thread it down through the third left eyelet, skipping the second.
2. Bring that same lace up from underneath the second left eyelet you just skipped.
3. Repeat on the opposite side with the left lace to complete the diamond shape.
Climb the Shoe With Pattern
Move upward by skipping the next available eyelet and bringing the lace down through the one above it. Then come back up from underneath the skipped eyelet. Switch laces and repeat this process. The pattern will build a series of stacked diamonds across the tongue.
Close the Top Cleanly
At the final eyelets, stop skipping and bring both laces down into the top holes to close the last diamond. Tuck the ends behind the tongue or tie loosely, ensuring you do not cover the intricate design you created.
Adjust Technique for Eyelet Count
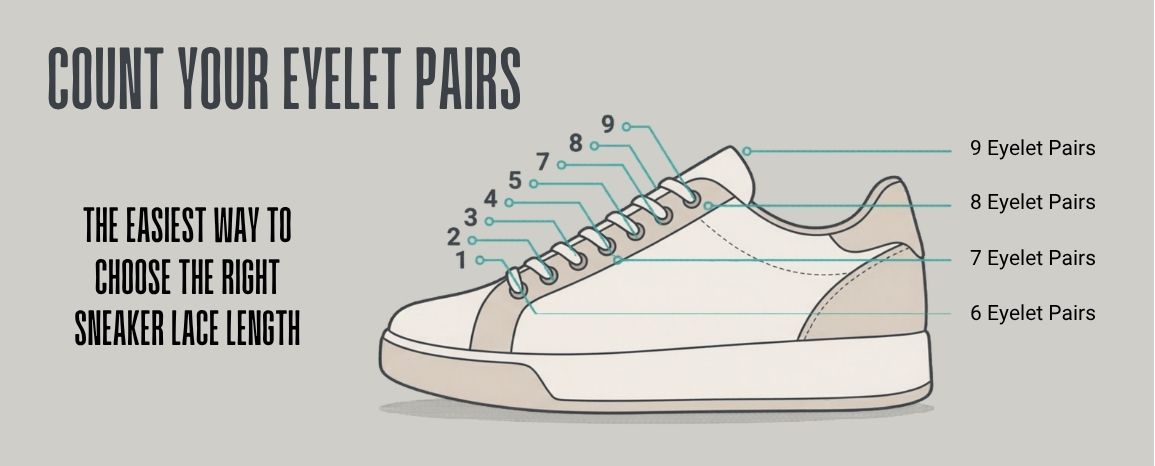
The number of eyelets on your specific model dictates the complexity and adjustments needed for your lacing pattern. Following model-specific guidelines ensures the best fit and look.
4-Hole Chunky Vans
Stick to criss-cross or straight bar lacing for these models. Feed both ends up through the bottom eyelets and keep tension even. This count is best for minimalist, low-profile styles where you let the chunky sole speak for itself.
5-Hole Knu Skool Setup
Use loose lacing exclusively for 5-hole configurations. Thread from outside in at the bottom and keep extra slack in the lower crosses. You may leave the top eyelets unlaced to enhance the oversized tongue and create a wider ankle opening.
6-Hole Models: New Skool and Knu Skool
Apply the over-under alternating method with intentional slack. This count is ideal for maintaining structure while keeping a relaxed fit. Leave the top 1-2 eyelets partially unlaced for easy slip-on access and tuck ends under the tongue.
7 to 8-Hole Variants
These models allow for more complex patterns like star or diamond lacing. Maintain even spacing and flat laces throughout the process. Balance is key, so ensure symmetry whether you choose loose lacing or intricate weaves.
Optimize Fit and Comfort Levels

Your lacing choice directly impacts how the shoe feels on your foot, especially if you have specific width needs or activity requirements.
Accommodate Wide Feet
If you have wide feet, loose lacing prevents pinching across the instep. Leave extra slack across the midfoot crosses to avoid lateral compression. Never pull tight over the instep, as the padded tongue should cushion without restriction.
Prioritize Slip-On Ease
For true slip-on function, combine loose lacing with the tuck and hide finish. The hidden loop keeps laces secure while eliminating the need to tie. Test the fit to ensure you can slide your foot in and out smoothly while the heel stays locked.
Balance Support for Activity
For skating or walking, avoid going too loose to prevent foot slippage. Use bar lacing or a light criss-cross with minimal tension. Ensure even spacing and flat laces to avoid pressure points during movement.
Maintain Laces for Longevity
Proper care preserves the aesthetic and functionality of your laces, particularly the flat laces preferred for chunky models. Regular maintenance prevents fraying and keeps colors vibrant.
Clean Without Damage
Remove laces before washing the shoes. Hand wash with mild soap and lukewarm water, avoiding bleach or harsh detergents. Rinse thoroughly and air dry completely before re-lacing to prevent odor or material breakdown.
Prevent Twisting and Fraying
Pause during lacing to smooth out twists with your fingers. Once a lace is twisted, it stays that way and ruins the clean look. If aglets start fraying, replace them or trim carefully and seal the end with clear nail polish.
Replace With Correct Length
When buying new laces, match the length to your eyelet count.
* 5-6 hole models: 48–54 inch flat laces.
* 7-8 hole models: 63–72 inch flat laces.
Too short prevents tucking, while too long creates excess bulk.
Fix Common Lacing Problems
Even experienced lacers encounter issues like twisting or uneven lengths. Knowing how to correct these mistakes quickly saves time and frustration.
Stop Laces From Twisting
If a lace twists during the process, stop immediately and unthread the last eyelet. Straighten the lace with your fingers and rethread. Twisted laces look messy and create uneven tension, so prevention is easier than correction.
Fix Uneven Lengths
If one side becomes longer, pull both ends together at the current level to re-balance. Starting with an even base by pulling both ends up together from the bottom is the best way to prevent this issue.
Loosen a Tight Fit
If your chunky Vans feel tight across the foot, you likely pulled the laces too hard. Re-lace using the loose method with deliberate slack. The tongue should remain puffed and not flattened by tension.
Keep Tucked Laces Secure
If tucked ends keep popping out, ensure you pull the lace behind the tongue before pushing it back up. Push the tongue firmly into place so its padding creates friction that holds laces securely against the inner sidewall.
Frequently Asked Questions About Lacing Chunky Vans
What type of laces work best for chunky Vans?
Flat laces are essential for chunky Vans like the Knu Skool and New Skool. They lay flush against the wide tongue and do not create the bulk that round laces do, ensuring a clean and authentic 90s silhouette.
How do I make my chunky Vans slip-on ready?
Use the loose lacing method and finish with the tuck and hide technique. By leaving slack and tucking the ends behind the tongue, you eliminate the need to untie knots, allowing you to slide your feet in and out easily.
Can I use bar lacing on Knu Skool models?
Yes, bar lacing works well on Knu Skool models if you want a structured look. However, you must maintain some slack to accommodate the oversized tongue and avoid compressing the padding too tightly.
Why do my laces keep twisting when I lace my Vans?
Laces twist when they are not smoothed out during the process. Pause at every eyelet to flatten the lace with your fingers before crossing to the next hole. Starting with pre-flattened laces also helps prevent this issue.
How long should laces be for 6-hole chunky Vans?
For 6-hole models like the New Skool, use flat laces between 48 and 54 inches. This length provides enough material to complete the pattern and tuck the ends securely without creating excessive bulk inside the shoe.
Key Takeaways for Mastering Chunky Vans Lacing
Mastering how to lace chunky Vans transforms both the comfort and style of your Knu Skool or New Skool shoes. By choosing the right method, such as loose lacing for slip-on ease or bar lacing for structure, you ensure the shoe fits your specific needs. Remember to always use flat laces, maintain intentional slack, and utilize the tuck-and-hide finish for a clean look.
Start with the loose lacing method today to experience the authentic 90s skate feel these shoes were designed for. With the right technique, your chunky Vans will look iconic and feel custom-made for your feet.