How to Lace Chuck Taylors: Quick Steps
Slipping on your Converse only to find the tongue sliding sideways or the heel lifting with every step is a frustratingly common experience. Many wearers struggle with this iconic shoe because they do not know how to lace Chuck Taylors to match their specific foot shape or style goals.
This guide provides actionable steps to fix fit issues using proven techniques from official specifications. You will learn precise lacing patterns for low-tops and high-tops while discovering how to eliminate heel slippage and tongue movement forever.
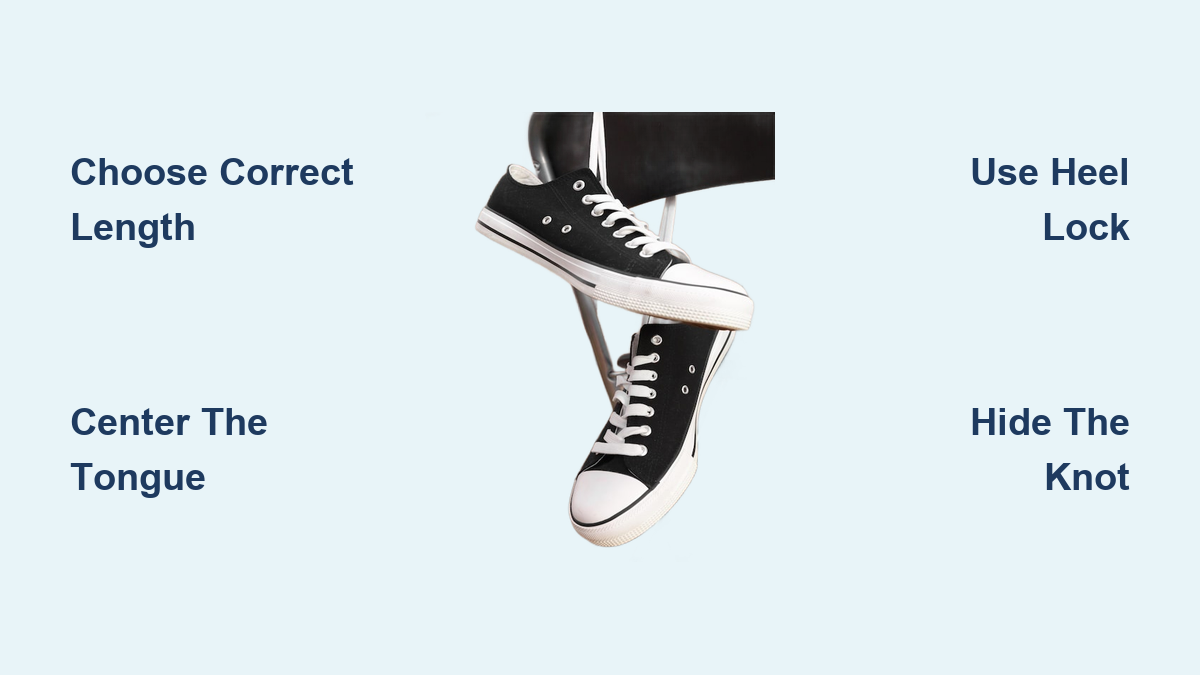
Select the Correct Lace Length for Your Model

Using the wrong lace length creates bulk or prevents you from reaching the top eyelets entirely. Proper sizing is the foundation of a secure and clean lacing job.
Match Laces to Eyelet Pairs
You must select your lace length based on the number of eyelet pairs on your specific shoe model.
* 7 Pairs: Use 45-inch laces (Common on some low-tops).
* 8 Pairs: Use 54-inch laces (Standard for most low-tops and some high-tops).
* 9 Pairs: Use 63-inch laces (Typical for high-top models).
An ideal lace allows you to thread all eyelets and tie a secure knot without excessive dangling material.
Prepare Laces Before Threading
Proper preparation ensures longevity and a polished look before you even start lacing.
* De-twist laces thoroughly to prevent premature wear and ensure they stay tied.
* Stretch new cotton laces across the lower eyelets as they often shrink during packaging.
* Center the tongue strictly under both eyelet rows to avoid discomfort and uneven tension.
* Remove creases from stored shoes using a steam iron for a smooth surface.
Master the Standard Crisscross Method
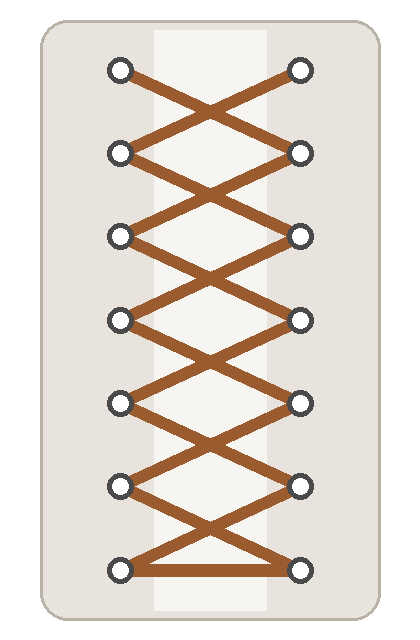
The factory-fresh look relies on a specific over-under pattern that differs slightly between low-top and high-top silhouettes.
Execute the Low-Top Factory Look
This method creates the classic diagonal pattern seen in original Converse photography.
1. Thread both lace ends through the two lowest eyelets from above (top-down).
2. Take one end, pass it over the tongue, and insert it into the opposite second eyelet from above.
3. Repeat on the other side, alternating upward until you reach the top.
4. Skip the tongue loop to maintain the authentic, relaxed aesthetic.
5. Tie a double knot or tuck the ends under the tongue for a hidden finish.
Keeping your laces flat and untwisted during this process creates a crisp diagonal line.
Polish Your High-Top Lacing
High-tops require a reversal at the top eyelet to maintain a seamless collar profile.
1. Start by threading laces down through the lowest eyelets from above.
2. Bring each lace up from underneath the next eyelet on the opposite side.
3. Continue this under-to-over pattern until you reach the second-to-last eyelet.
4. For the final step, thread the lace down into the top eyelet from above.
5. Tie a loose bow and tuck it completely behind the tongue.
This reversal prevents the laces from pulling up awkwardly and keeps the high-top collar smooth.
Apply Advanced Aesthetic Lacing Styles

You can transform the visual character of your shoes using specialized patterns designed for streetwear or minimalist outfits.
Create Horizontal Bars
Bar lacing replaces diagonal lines with clean horizontal bars for a modern look.
* Thread both ends through bottom eyelets from inside out.
* Bring one lace up through the opposite first eyelet and straight across to form a bar.
* Pass the second lace under the first bar and up through its own next eyelet.
* Repeat the process, alternating sides and maintaining consistent tension.
* Tuck the ends down the side for high-tops or tie normally for low-tops.
This technique eliminates zigzag clutter for a sharp, structured appearance.
Hide the Knot Completely
Achieve a seamless finish by concealing the entire tying mechanism inside the shoe.
1. Lace the shoe using your preferred crisscross or bar method.
2. Instead of tying outside, pull both lace ends inside the shoe through the top eyelets.
3. Tie the knot securely inside the collar area.
4. Smooth the tongue over the knot to hide it entirely.
This method is ideal for high-tops worn with rolled cuffs or cropped pants where a clean ankle line matters.
Add Playful Decorative Touches
Inject personality into your look with creative top finishes like Bunny Ears or Bow Ties.
* Bunny Ear: Tie a single loop on each side after regular lacing and cross them into a bow.
* Bow Tie: Use a shorter lace section at the top eyelets to form a flat horizontal bow shape.
* Color Pop: Use contrasting lace colors to make these decorative elements stand boldly.
These styles work best when you want your footwear to serve as a statement piece.
Fix Common Fit and Comfort Issues
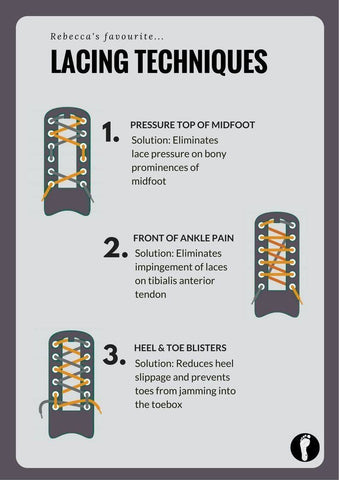
Specific lacing modifications can resolve anatomical mismatches that cause pain or instability during wear.
Stop Tongue Slippage Immediately
A wandering tongue ruins comfort and often stems from loose lower lacing or poor alignment.
* Center the tongue by tucking its edges under the eyelets before tightening.
* Snug the second eyelet pair specifically, as this area anchors the tongue position.
* Create a custom notch if your shoe lacks one by cutting two small parallel slits between the fifth and sixth eyelets.
* Thread the lower lace through these slits to mechanically lock the tongue in place.
Caution: Only cut slits into the tongue if you are certain your model does not already have a built-in centering feature.
Prevent Heel Slippage
Loose heels make Chucks feel sloppy and can cause blisters during extended walking.
1. Lace normally until you reach the second-to-last eyelet on each side.
2. Thread the lace up through the top eyelet to create a small loop on each side.
3. Cross the laces and thread each end through the opposite side’s loop.
4. Pull tight to create a locking cradle around your ankle before tying the final knot.
This “heel lock” technique secures the foot without requiring excessive overall tightness.
Customize Lacing for Wide or Narrow Feet

Using two different laces allows you to apply differential tension to accommodate unique foot shapes.
Adjust for Wide Forefeet
If your toes feel cramped but your heel slips, use a longer lace at the bottom and a shorter one at the top.
* Install the longer lace at the toe eyelets and keep tension loose.
* Install the shorter lace at the heel eyelets and tie tightly.
* This configuration accommodates width at the front while locking the heel securely.
Adjust for Narrow Heels
Conversely, if your heel is narrow but your forefoot is standard, reverse the lace lengths.
* Use a shorter lace at the bottom to tighten the forefoot area.
* Use a longer lace at the top to allow a looser, more comfortable ankle fit.
* Match the lace colors so the dual-lace setup remains invisible to observers.
This orthopedic approach solves fit issues that standard single-lace methods cannot address.
Maintain Materials for Longevity
Proper care of your laces extends the life of both the laces and the shoe structure.
Choose the Right Lace Material
Select materials that match your aesthetic and functional needs for the best results.
* Flat laces offer a clean, modern finish compared to round alternatives.
* Waxed laces resist twisting and hold knots significantly better than untreated cotton.
* Original colors like off-white or black maintain the authentic factory look.
* Avoid cutting laces too short; tucking excess length is always safer than risking insufficient length.
Ensure Long-Term Durability
Regular maintenance keeps your laces looking fresh and functioning correctly.
* Check for twists regularly and untwist them during re-lacing sessions.
* Re-tension after the first few wears as new cotton laces stretch into their working length.
* Replace frayed laces immediately since worn materials compromise security and fit.
Compare Lacing Styles for Your Needs

Selecting the right style depends on whether you prioritize aesthetics, security, or comfort for your daily activities.
| Style | Best For | Security Level | Visual Aesthetic |
|---|---|---|---|
| Standard Crisscross | Everyday wear | High | Classic diagonal |
| Bar Lacing | Streetwear | High | Minimalist horizontal |
| Straight Across | Photos only | Low | Clean lines |
| Heel Lock | Sports/Running | Very High | Functional bulk |
| Hidden Knot | Style focus | Medium | Seamless finish |
Avoid the Straight Across method for daily wear as it fails to secure the foot properly despite its clean look in advertisements.
Frequently Asked Questions About Lacing Chuck Taylors
What is the best way to lace Chucks for wide feet?
Use two different laces to create differential tension. Place a longer lace at the bottom for room and a shorter lace at the top to lock the heel securely.
How do I stop my Converse tongue from sliding?
Ensure the tongue edges are tucked under the eyelets and snug the second pair of eyelets tightly. You can also cut small notches in the tongue to anchor the lace if needed.
Should I use the tongue loop on my Chuck Taylors?
For the classic factory look, skip the tongue loop entirely. Use the loop only if you require a tighter, more secure fit around the midfoot.
What lace length do I need for high-top Chucks?
High-top models typically have 8 or 9 eyelet pairs, requiring 54-inch or 63-inch laces respectively to ensure you can reach the top and tie a knot.
How can I hide my shoelace knots?
Thread the lace ends back inside the shoe through the top eyelets after lacing. Tie your knot inside the collar and smooth the tongue over it for a seamless finish.
Is bar lacing secure enough for walking?
Yes, bar lacing provides high security and a defined fit. It is an excellent alternative to crisscross lacing for daily wear and streetwear styles.
Key Takeaways for Lacing Chuck Taylors
Mastering how to lace Chuck Taylors transforms both the comfort and style of this iconic shoe. By selecting the correct lace length, applying the right pattern for your model, and using functional adjustments like the heel lock, you can eliminate common fit issues entirely.
Take a few minutes today to re-lace your pair using these techniques. Whether you need to accommodate wide feet or simply want a cleaner look, the right method makes your Chucks feel custom-made for you.