How to Make Lace: Simple Steps
Lace making transforms simple thread into intricate art, yet many beginners struggle to find clear instructions on how to make lace without feeling overwhelmed. This ancient craft offers a meditative escape while producing durable, elegant results that connect you to centuries of tradition.
You will learn the distinct differences between bobbin and needlepoint methods while gathering the exact tools needed for success. This guide provides step-by-step stitch instructions, time estimates for various projects, and expert troubleshooting tips to ensure your first pieces turn out perfectly.
Choose Between Bobbin and Needlepoint Lace Methods
Your journey begins by selecting a technique that matches your patience level and desired aesthetic. Bobbin lace utilizes multiple threads wound on spools that you cross and twist over pins on a pattern pillow. Needlepoint lace, specifically the Battenburg style, builds structure using a single needle and thread often worked around a lace tape foundation.
Bobbin lace excels at creating flowing, organic patterns like floral scrolls through rhythmic movement. Needlepoint lace offers superior control for geometric shapes and sharp edges, making it ideal for historical reproductions. Your choice ultimately depends on whether you prefer managing many threads simultaneously or working methodically with one needle.
Which Lace Style Fits Your Goals?
Ask yourself if you enjoy rhythm or structure more. Bobbin lace becomes a rhythmic dance once you master the twist-and-cross motion, though losing track of one bobbin can ruin hours of work. Needlepoint lace provides visible progress row by row, allowing you to pause and resume easily without losing your place.
Beginners often find needlepoint more accessible due to its gentler learning curve. If you love precision and detail, this structured approach will feel familiar. Those drawn to the magic of weaving air with thread may prefer the challenge of bobbin work. Many modern makers start with needlepoint to build confidence before branching into complex bobbin projects.
Gather Essential Tools for Your Chosen Technique
Preparing the correct equipment prevents frustration and ensures professional results. Each method requires specific items that directly impact your ability to maintain tension and execute fine details. Investing in quality tools from the start saves time and improves your learning experience significantly.
Bobbin Lace Setup Requirements
You need a firm lace pillow to hold your pattern and pins securely during work. Traditional round pillows function well, but lace roll pillows or bolster styles offer better support for long sessions and complex shaping. You will also need bobbins made of wood or plastic to hold your thread, with simple projects requiring 5 to 10 while complex designs need 100 or more.
Secure your thread crossings with sharp pins placed according to your pattern. Use high-quality cotton thread, preferably Egyptian cotton, for its strength and fineness. Add Japanese silk gimp for decorative outlines that provide refined definition. Your pricking, or printed pattern, pins to the pillow and guides every single stitch you make.
Needlepoint Lace Kit Essentials
Your toolkit for needlepoint lace differs slightly but remains equally specific. Select size 10 or 12 cotton thread, using size 10 for practice and size 12 for fine historical work. A ballpoint needle is crucial to avoid splitting the lace tape or existing threads during execution.
Prepare a sturdy cotton backing fabric cut to 18 by 60 inches and folded in thirds. Place a contrasting cotton layer on top to make your stitches clearly visible. Mark a grid of nine 3×3 inch squares using a Clover chalk pen. You will also need lace tape cut with a 1-inch margin, pointed scissors, basting thread, and thread anchors to stabilize tension.
Master Basic Bobbin Lace Stitches
Start your bobbin lace journey with torchon lace, a basic style using four pairs of bobbins. This method creates geometric diamond patterns while teaching core skills like crossing, twisting, and maintaining consistent tension. Use a simple pricking with clear lines and pin placements to guide your hands.
Practice the half stitch and cloth stitch first to build a strong foundation. The half stitch involves a single cross between thread pairs for lighter textures. The cloth stitch builds dense fabric areas through a specific sequence of crosses and twists. These two stitches form the basis of most bobbin lace designs you will encounter.
Build Muscle Memory Gradually
Tension control is everything in bobbin lace creation. Let the weight of the bobbins help regulate tension rather than pulling too hard with your hands. Keep your hands relaxed throughout the process to prevent fatigue and uneven results.
Check for snarled threads or miscounted crosses if your lace looks uneven. Start with small projects like a lace bracelet or beaded earring to apply basic stitches without committing to hours of work. The Lace Guild offers beginner-friendly patterns in their Early Days In Lacemaking magazine that are ideal for building confidence.
Create a Needlepoint Lace Sampler Grid
Your sampler serves as your primary training ground for mastering various stitches. Cut 18×60 inches of sturdy cotton, fold it into thirds, and place a contrasting fabric of the same size on top. Use a chalk pen to mark nine 3×3 inch squares clearly on the surface.
Baste the layers together securely to prevent shifting during work. This grid allows you to practice different stitches in each square, creating a reference tool you will use for years. Label each square lightly with the stitch name and keep the work taut by pinning it to a board or foam pad.
Baste the Lace Tape Correctly
Cut your lace tape with a 1-inch margin on each side to prevent fraying and allow secure basting. Place the tape along your marked grid lines and baste it in place with long, removable stitches. This extra length gives you room to work without damaging the foundation.
Use ballpoint needles to avoid damaging the tape fibers during this process. Keep basting stitches loose enough to remove later but tight enough to hold the tape completely flat. Misaligned tape leads to crooked lace, so double-check your placement before beginning any stitching.
Learn Core Needlepoint Stitches Step by Step

Mastering specific stitches unlocks the ability to create complex and beautiful designs. Each stitch builds upon the previous one, adding texture, density, or geometric interest to your work. Practice each technique on your sampler grid until the motion becomes automatic.
Single Brussels: First Stitch to Master
Secure your thread with two buttonhole knots at the top corner of your tape. Work a looped stitch along the tape while keeping tension even throughout the row. This stitch forms the base for many other advanced techniques in needlepoint lace.
Loops may ride up and create lumps if your tension is inconsistent. Use thread anchors to stabilize your work and prevent these issues. Even with anchors, early attempts may show slight joins, but this improves significantly with practice and patience.
Twisted Single Brussels: Add Texture
Make a small loop and pass the needle through the tape to begin this textured variation. Weave over and under the loop before tightening it down securely. Whip the loop to the tape and finish with two knots to lock it in place.
This stitch adds dimension and rhythm to your lace pieces. Once the motion clicks, it becomes satisfyingly repetitive and builds confidence. Practice until the twist lies flat and consistent across your entire row.
Double Brussels Net: Build Density
Work two stitches close together in the same row to create this denser fabric. It functions like the single stitch but produces a stronger and more opaque result. Use this stitch in areas needing extra support, such as collar edges or structural elements.
Keep stitches tight but ensure they do not pucker the underlying tape. This balance creates a professional finish that mimics historical examples. Consistency in spacing is key to achieving the desired density.
Corded Single Brussels: Avoid Bowing
Start like the single stitch, but when you reach the end, bring the thread back and repeat the process. This creates a double-thick corded edge that adds significant structure. The technique requires careful attention to tension on the return leg.
The biggest mistake involves pulling too hard on the return leg, which makes the tape bow. Consciously relax your tension on the way back to prevent distortion. Let the thread lie flat before securing each stitch for the best results.
P Stitch: Fast and Rhythmic
Alternate rows by making row one double Brussels and row two single Brussels. This sequence creates a textured, repeatable pattern that many find rewarding. The rhythm of alternating stitches builds muscle memory quickly.
Many lacemakers find this stitch fast and enjoyable to execute. It serves as a great confidence booster due to its visible progress and forgiving nature. Use it for larger areas where speed and texture are priorities.
Buttonhole Net: For Historic Accuracy
This stitch is key for reproducing vintage pieces like Charles Worth’s gowns accurately. Row one consists of spaced single Brussels stitches to create a foundation. Row two requires triple (buttonhole) stitches worked into the loops from the previous row.
Row three involves single stitches between the buttonhole loops to complete the net. Use triple stitches instead of double for true historical authenticity. Fatigue often causes bottom rows to widen, so take breaks and use three thread anchors for stability.
Four-Hold Diamond: Create Geometry
Skip three loops and finish the row to begin this geometric pattern. In the next row, skip three loops before catching the unworked section to form the shape. Repeat this sequence, working into unworked loops and skipping three mid-row.
Complete the diamond shape over four rows and repeat the sequence twice per square. This stitch creates satisfying geometric forms that demonstrate advanced skill. Tension shifts may cause one side to tighten, so practice consistency in your hand pressure.
Diamond Stitch: Single-Double-Triple Variation
Start row one with spaced double Brussels stitches for the foundation. Work single stitches between doubles in row two, adding triple stitches on the loops. Row three requires double stitches on the loops of the triple stitches from the previous row.
Finish with a whipped edge to mimic a double Brussels stitch and secure with a knot. This variation is rich and complex, offering a visually striking result. Slight tension imbalances are normal, so focus on clean loops and secure knots.
Switch to Fine Thread for Delicate Work
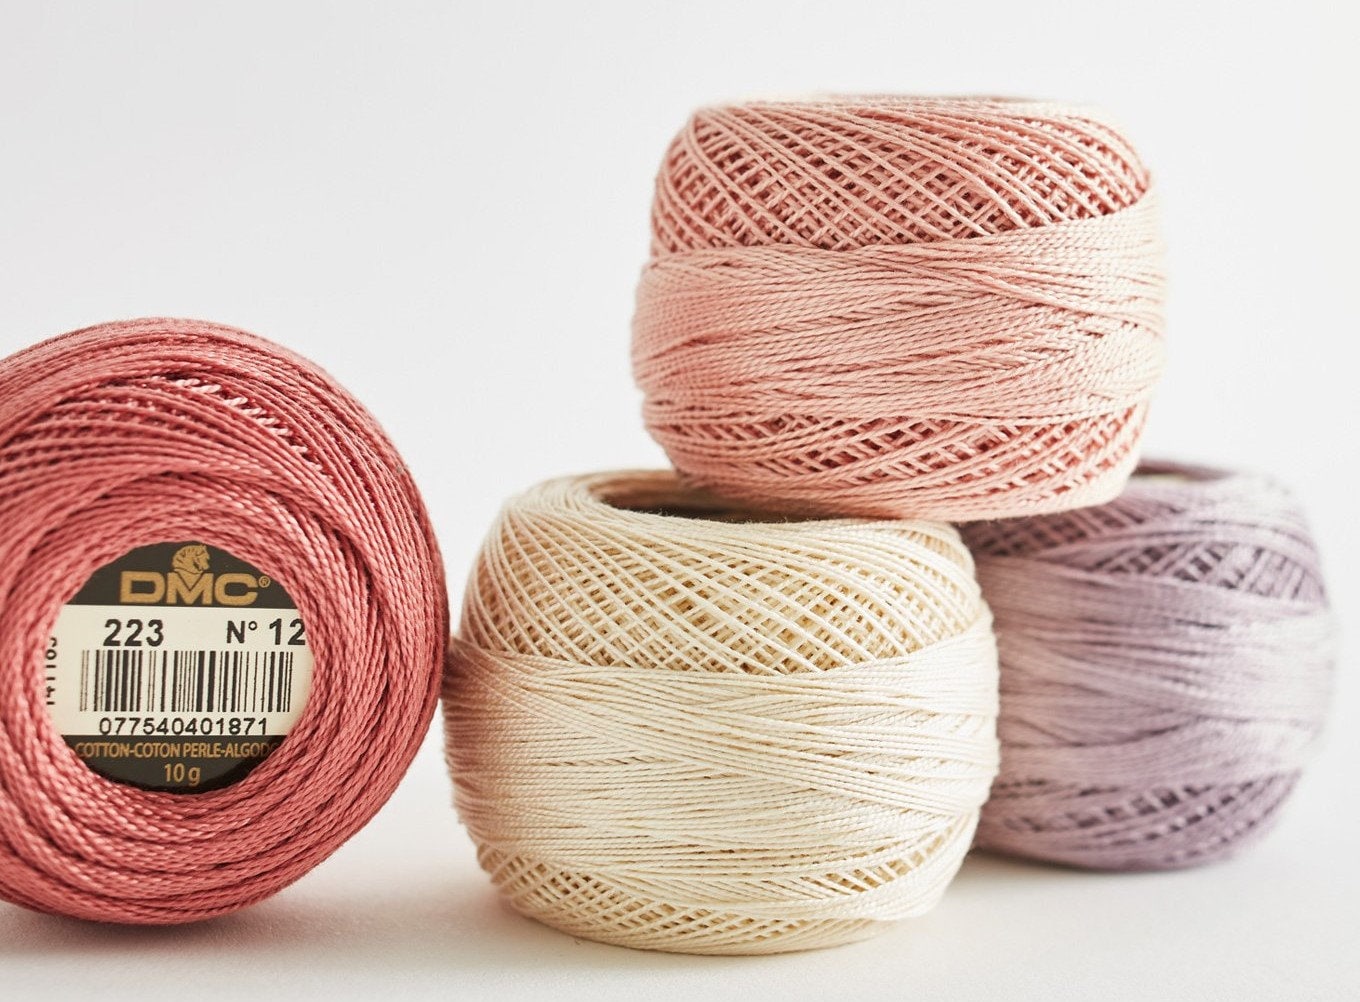
Moving from size 10 to size 12 purl cotton increases stitch density and precision dramatically. More stitches per inch mean longer completion times, with a single 3×3 inch square taking 6.5 hours instead of 3. Fine thread mimics historic fabrics but demands significantly more control and focus.
Use three thread anchors to maintain consistent tension with these finer materials. Your hands will tire faster due to the increased precision required. Schedule shorter, focused sessions when working with size 12 thread to maintain quality.
Manage Time and Fatigue Effectively
A full sampler with mixed threads can take 34 hours to complete entirely. Long sessions lasting up to 8 hours lead to fatigue, especially in the hands and eyes. This fatigue directly impacts the quality and consistency of your lace.
Work in 90-minute blocks with regular breaks to maintain focus. Use good lighting and a comfortable chair to reduce physical strain. Save fine thread work for days when you are fresh and fully focused on the task.
Fix Common Lace Making Problems
Troubleshooting common issues saves time and prevents frustration during your learning process. Most problems stem from tension inconsistencies, equipment limitations, or fatigue. Identifying the root cause allows you to apply the correct fix immediately.
Stop Tension Inconsistencies
If your lace widens at the bottom, fatigue is likely the culprit. If loops ride up, your tension is too loose during execution. The solution involves using thread anchors from the very start of your project.
Take breaks every hour to reassess your grip and posture. Tight hands cause tight stitches, so relax your shoulders and wrists regularly. Anchors act like training wheels, keeping tension steady while you build muscle memory.
Prevent Tape Bowing
Bowing happens when the return leg of corded stitches pulls too tightly. Fix this by consciously easing up on the pull during the return pass. Before securing each stitch, check that the tape lies completely flat against the backing.
If bowing occurs, gently steam the area with an iron on low heat without direct contact. Prevention is always better than correction, so monitor your tension constantly. Relaxing your hand pressure on the return leg solves most bowing issues.
Handle Thread Joins Smoothly
Lumps at joins are common for beginners learning to manage thread ends. Practice invisible splices or tie small knots under the tape to hide them. With size 12 thread, knots must be tiny to avoid creating bulk.
Over time, your joins will become nearly invisible as your skill improves. Do not rush this process, as each knot matters for the final appearance. Patience during joins ensures a professional finish on your lace pieces.
Upgrade Your Pillow for Complex Work
Standard pillows may not support 3D shaping required for advanced designs. If your lace loses form, invest in a lace roll pillow costing around $100. It holds complex curves and reduces strain on your hands and back.
While this represents a cost, it is essential for serious work and complex projects. Think of it as ergonomics for lace making that pays off in quality. The right support allows you to work longer with better results.
Finish and Preserve Your Lace Properly
Completing your project requires careful finishing to ensure longevity and beauty. Proper removal from the backing prevents damage to your delicate stitches. Following these steps ensures your hard work lasts for generations.
Remove Backing Safely
When your sampler is complete, remove basting stitches from the back carefully. Never cut into the lace itself during this process to avoid ruining your work. Gently peel the lace from the backing fabric once all stitches are removed.
Press lightly with a cool iron and a pressing cloth to smooth any wrinkles. Now you have a durable reference piece to guide future projects. Frame it, bind it into a book, or use it to plan larger designs.
Store and Display Properly
Lace yellows with light exposure, so proper storage is critical for preservation. Store your pieces in acid-free tissue away from direct sunlight completely. For display, use UV-protective glass to prevent fading over time.
Never wash lace unless absolutely necessary to avoid damaging the fibers. If cleaning is required, hand-launder in cool water with mild soap gently. Block it flat to dry to maintain its original shape and dimensions.
Join the Lace Making Community
Connecting with other makers accelerates your learning and provides ongoing support. Guilds and schools offer resources that books alone cannot provide. Engaging with the community keeps you motivated and informed about new techniques.
Learn from Guilds and Schools
The Lace Guild offers patterns, tutorials, and Early Days In Lacemaking magazine perfect for beginners. The Brooklyn Lace Guild hosts virtual meetups, connecting makers worldwide for shared learning. These groups provide mentorship and access to exclusive patterns.
For immersive study, the Idrija Lace School in Slovenia hosts an annual festival and intensive courses. It serves as a pilgrimage for serious lacemakers seeking deep knowledge. Academic institutions like NYU Costume Studies and FIT offer paths for research or preservation interests.
Access Expert Resources
Study historic techniques at the Antonio Ratti Textile Center at the Met for inspiration. Read Starting Needlepoint Lace by Valerie Grimwood for foundational skills. The 1912 classic The Priscilla Battenberg and Needle Lace Book remains a valuable reference.
These resources provide context and technical depth to your practice. Understanding the history behind the stitches enhances your appreciation and skill. Use these tools to deepen your knowledge and refine your technique.
Invest in Quality Tools Over Speed

Prioritizing quality tools prevents frustration and improves your final results significantly. A $100 pillow or $20 silk gimp is not an indulgence but a necessity for serious work. Fine thread requires fine tools to achieve the best possible outcome.
Buy the best you can afford and start with basics before upgrading. As your skills progress, invest in higher-quality equipment to match your ambitions. Good tools make the learning process smoother and more enjoyable.
Patience Builds Mastery
Lace is not a fast craft, and a custom collar can take 300 hours to complete. Each stitch builds skill and muscle memory over time. The craft rewards patience and consistency rather than speed or rushing.
Do not compare your first square to a master’s finished work. Focus on clean knots, even tension, and steady progress each session. With time, your pieces will reflect the dedication and care you put into every stitch.
Frequently Asked Questions About How to Make Lace
How long does it take to make a piece of lace?
A single 3×3 inch square takes about 3 hours with size 10 thread but increases to 6.5 hours with size 12 thread. Complex garments like custom collars can require up to 300 hours of dedicated work. Time investment depends heavily on thread fineness and pattern complexity.
What is the difference between bobbin and needlepoint lace?
Bobbin lace uses multiple threads on bobbins crossed over pins for flowing designs. Needlepoint lace uses a single needle and thread, often with lace tape, for structured geometric patterns. Your choice depends on whether you prefer rhythmic multitasking or methodical single-thread work.
Do I need special tools to start making lace?
Yes, you need specific tools like a lace pillow, bobbins, pins, and high-quality cotton thread for bobbin lace. Needlepoint lace requires ballpoint needles, lace tape, and thread anchors. Using the correct tools ensures proper tension and prevents frustration.
Can beginners learn how to make lace easily?
Beginners often find needlepoint lace more accessible due to its gentler learning curve. Starting with a sampler grid helps build confidence before attempting complex projects. Consistent practice and community support make the learning process manageable.
How do I prevent my lace tape from bowing?
Bowing occurs when you pull too tightly on the return leg of corded stitches. Consciously relax your tension on the return pass to keep the tape flat. Using thread anchors also helps stabilize tension and prevent distortion.
Key Takeaways for Learning How to Make Lace
Mastering how to make lace requires choosing the right technique, gathering proper tools, and practicing consistently. Whether you select bobbin or needlepoint methods, starting with a sampler grid builds the foundation for success. Patience and attention to tension are the most critical factors in creating beautiful work.
Focus on quality tools and community resources to accelerate your learning journey. Join a guild, study historical examples, and embrace the meditative rhythm of the craft. Your first stitches mark the beginning of a rewarding path to creating timeless art.