How to Bleach Lace: Quick Steps
You just installed a new lace wig, but those tiny black dots at the base scream “fake” instead of flawless. Learning how to bleach lace knots lightens these dark spots to match your scalp tone for an undetectable finish. Without this crucial step, even the most expensive wig can look unnatural and doll-like.
This guide walks you through heat training, mixing the perfect formula, and toning brassy hues safely at home. You will discover the exact tools and timing needed to transform visible knots into a seamless hairline without damaging your investment.
Heat Train Hair Before Applying Bleach
You must prep the hair before any chemical touches the lace base. If strands lie flat against the mesh, they will absorb bleach and turn patchy orange or break entirely. Heat training ensures only the knots get exposed to the lifting agent.
Use a Hot Comb to Lift Strands
Take a hot comb and gently brush the hair in the opposite direction of its natural fall. If the style is slicked back, comb the hair forward to make every strand stand upright. Focus heavily on the hairline and nape where hair tends to lay flat against the base.
Ensure No Hair Touches the Lace
Blow-dry the entire lace area after combing to lock the lifted position in place. Inspect the base closely to confirm no single strand is resting on the mesh surface. This simple precaution prevents accidental discoloration of your hair shafts during the process.
Mix the Right Bleach Formula Consistency

Getting the mixture wrong is the leading cause of failed bleaching attempts. A runny mix seeps through to ruin hair roots, while a thick paste fails to lift the knots effectively. Precision in your ratio creates the perfect environment for even lightening.
Choose 30 Volume Developer
Stick with 30 volume developer as your primary lifting agent for safe and reliable results. While 40 volume works faster, it is difficult to control and poses a high risk of burning the lace or hair. Lower volumes often fail to lift black knots enough to blend with skin tones.
Achieve Toothpaste-Like Consistency
Mix two parts developer to one part bleach powder in a plastic or glass bowl. Stir the mixture for three to five minutes until it becomes smooth and uniform without any lumps. The final texture must resemble thick toothpaste that stays on your tool without dripping.
- Add more powder if the mix drips off the spatula.
- Mix in tiny drops of developer if the paste is too clumpy.
- Never use metal bowls as they react negatively with bleach chemicals.
Apply Bleach with a Plastic Knife
Your choice of application tool directly impacts the cleanliness of your result. Brushes tend to drag product down the hair shafts, whereas a flat edge offers superior control. Using the right implement keeps the bleach exactly where you want it.
Use the Buttering Technique
Start at the most visible hairline section and glide your plastic knife across the lace gently. Imagine you are spreading butter on toast to saturate the knots without pressing too hard. This motion ensures even coverage while preventing the mixture from pushing through to the roots.
Cover with Aluminum Foil
Lay a sheet of aluminum foil directly over the applied bleach immediately after saturation. Place the foil shiny side up to reflect heat back onto the lace and speed up the chemical reaction. This barrier also stops the mixture from drying out before the knots are fully lifted.
Monitor Processing Time Closely
Timing determines whether your knots look natural or disintegrate completely. Leaving bleach on too long weakens the bond holding the hair, while removing it too early leaves dark visible dots. Constant monitoring is essential for a successful outcome.
Check Every 10 to 15 Minutes
Gently lift a corner of the foil to inspect the color progress of the knots. Most wigs require between 20 and 45 minutes depending on the desired shade and original knot darkness. Do not walk away or set a timer for the full duration without checking.
Stop at Honey or Light Brown
Aim for a light brown, honey, or pale blonde color rather than stark white. The goal is to match your scalp tone, not to erase the knots entirely which can cause shedding. Over-bleached knots lose their structural integrity and increase the risk of hair loss.
Rinse and Neutralize Immediately
You must stop the chemical reaction the moment the knots reach the right shade. Residual bleach continues to process even after you think you have washed it all away. Immediate neutralization protects the lace and hair from further damage.
Rinse with Warm Water
Wash off all visible bleach residue using warm water rather than hot water. Be thorough in your rinsing to ensure no product remains trapped in the lace mesh. Leftover chemicals can cause scalp irritation or unwanted discoloration later.
Apply Neutralizing Shampoo
Massage a neutralizing shampoo directly into the lace and knots to halt the bleaching process instantly. Let the shampoo lather for about 30 seconds before rinsing it out completely. Skipping this critical step risks over-processing and permanent lace damage.
Tone Orange or Yellow Knots

Bleached knots often reveal unwanted brassy undertones that look unnatural against the skin. Toning corrects these colors to create a realistic scalp illusion. Choosing the wrong toner can leave your wig looking dull or still too orange.
Fix Orange Knots with Blue Shampoo
Most bleached knots lift to a Level 7 orange shade that requires blue tones to neutralize. Apply blue shampoo directly to the lace and let it sit for one to three minutes before rinsing. This cancels the brassiness and creates a cool, natural appearance.
Use Purple Shampoo for Yellow Tones
Reserve purple shampoo only for knots that have lifted to a very light Level 9 or higher. Purple neutralizes yellow tones but does nothing to fix orange brassiness. Using it on orange knots will result in a muddy or ineffective tone correction.
Condition the Hair After Bleaching
The bleaching process strips essential moisture from the hair fibers. Without proper conditioning, your wig strands will become dry, brittle, and prone to splitting. Restoring hydration keeps the hair soft and manageable for styling.
Restore Softness with Deep Conditioner
Apply a rich moisturizing conditioner to the mid-lengths and ends of the hair strands. Avoid soaking the roots unless you plan to rinse extremely thoroughly to prevent loosening knots. Let the product sit for five to ten minutes before rinsing with cool water.
Pluck After Bleaching for Natural Hairline
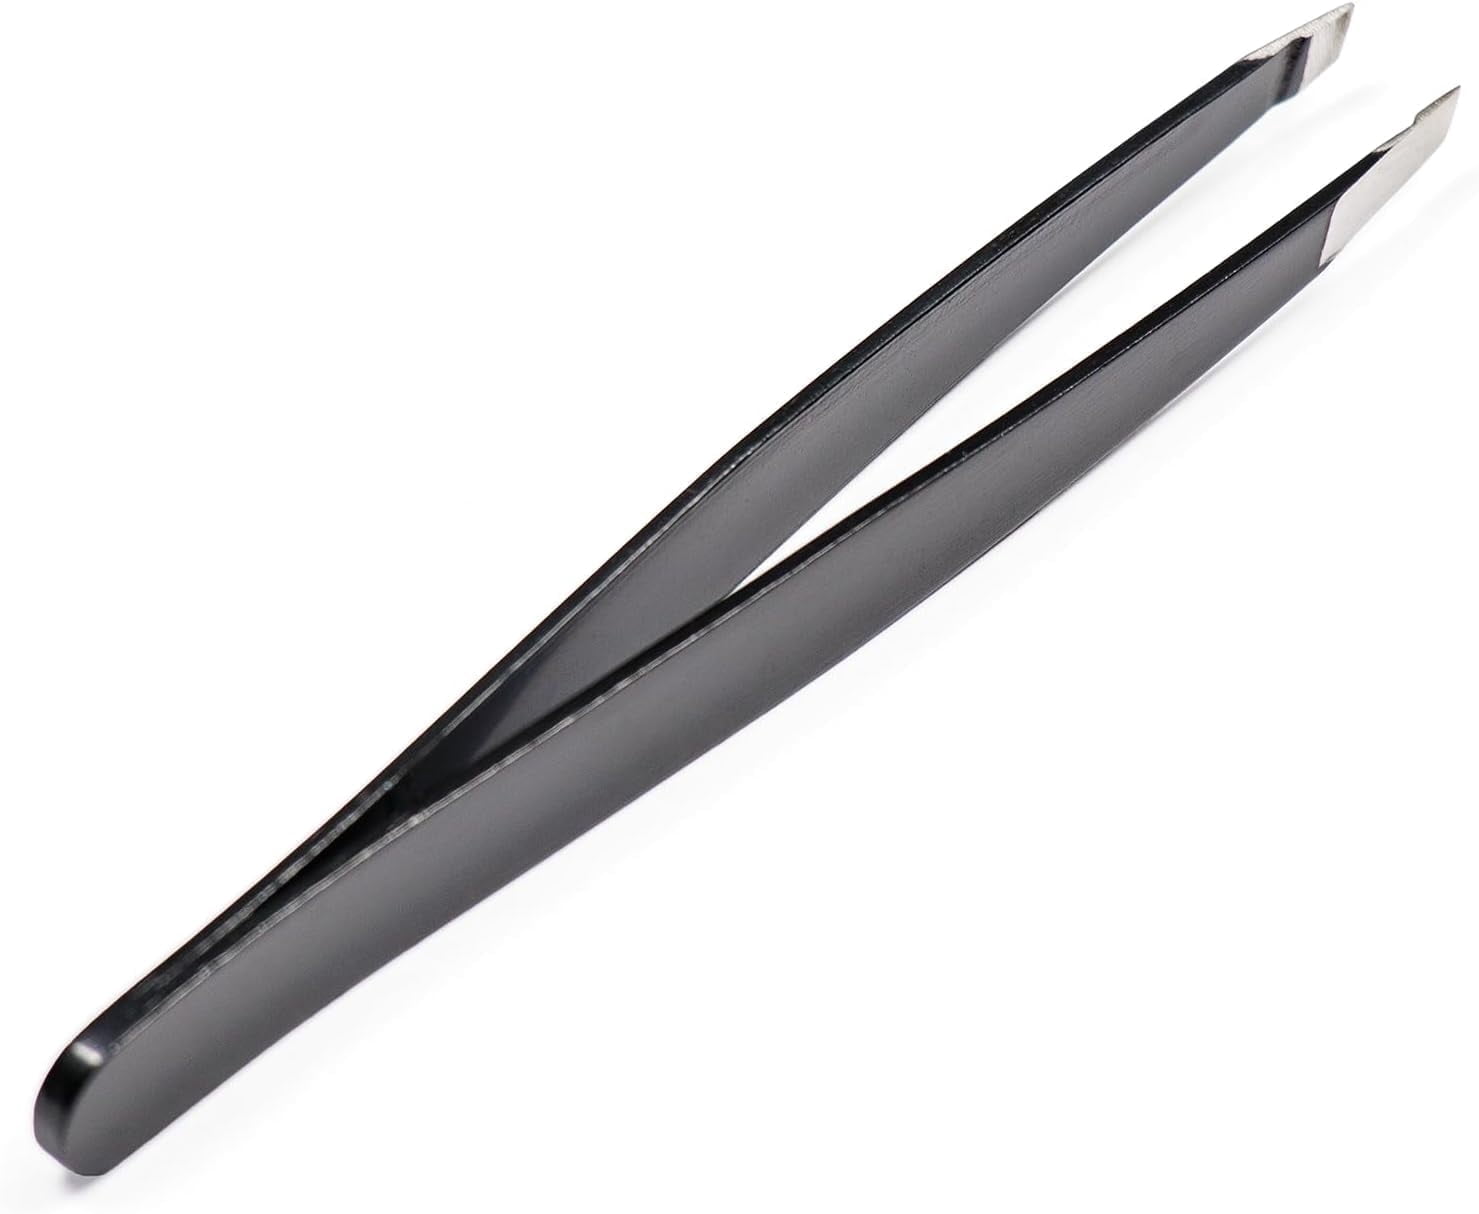
Factory wigs often have unnatural density that gives away their artificial origin. Plucking thins the hairline to mimic organic growth patterns. Always bleach first because the softened knots make extraction significantly easier and cleaner.
Use Slanted Tweezers for Control
Select slanted tweezers instead of pointed ones to avoid tearing large holes in the lace. Slanted tips provide a better grip on individual strands for precise removal. This tool choice minimizes damage while allowing you to create a realistic density.
Create a Zigzag Growth Pattern
Part the hair down the middle and work on sections about one inch back from the front. Pull hairs in random, scattered patterns rather than straight rows to mimic nature. Embrace irregularity since natural hairlines are never perfectly symmetrical.
Preserve Density Near the Part
The center part of your wig should remain full to avoid looking sparse or unnatural. Over-plucking in this specific area creates a wide gap that looks obviously fake. Strategic preservation of density here maintains a believable volume.
Keep 0.5 cm Zone Untouched
Leave a half-centimeter buffer on both sides of your part line completely untouched. Only remove one or two hairs in this zone if absolutely necessary for your specific look. This maintains volume while still allowing for a soft and realistic edge.
Reduce Bulk Behind the Hairline
Gently sway your forearm against the back of the lace to remove loose hairs naturally. You can also comb lightly from back to front to catch excess strands without damaging knots. Never comb aggressively over the knots as snagging causes unnecessary shedding.
Dry and Heat-Set the Final Style
Styling your wig while it is soaking wet increases the risk of breakage and distortion. Wait until the unit is semi-dry before attempting any final pressing or plucking adjustments. Proper drying ensures your hard work lasts through multiple wears.
Press the Hairline with a Hot Comb
Use a hot comb to lay the hair back and set the direction of your new hairline. Work slowly to avoid tugging on the freshly bleached and plucked knots. This step reveals the true hairline and locks in your desired shape.
Refine with Final Plucking
Recheck the hairline after pressing to see if any final tweaks are needed. Use your tweezers to perfect the zigzag pattern now that the hair is dry and styled. Press one last time to ensure the shape stays secure.
Troubleshoot Common Bleaching Issues
Even with careful preparation, things can sometimes go wrong during the bleaching process. Knowing how to fix common mistakes saves your wig from ruin. Quick action can often reverse or hide minor errors effectively.
Orange Knots Won’t Go Away
If blue shampoo did not fix the brassiness, you likely used the wrong product or did not leave it on long enough. Reapply blue shampoo specifically to the orange areas and let it sit for two to three minutes. Repeat this process if the orange tones persist after rinsing.
Hair Roots Turned Blonde
This issue occurs when bleach is too runny or left on for too long. Use a temporary root touch-up spray or makeup to darken the roots immediately. For a permanent fix, dye the roots back to black with permanent hair dye.
Excessive Shedding After Bleaching
Some shedding is normal, but alarming amounts usually indicate over-processing or rough handling. Prevent future loss by using 30 volume developer and neutralizing immediately after rinsing. Handle the wig gently while it is wet to protect the weakened knots.
Maintain Bleached Lace Long-Term
Proper care extends the life of your bleached lace and keeps it looking fresh. Regular maintenance prevents buildup and protects the integrity of the chemical treatment. Follow these tips to ensure your wig lasts as long as possible.
Wash with Sulfate-Free Products
Sulfates strip color and dry out the knots quickly after bleaching. Use gentle, sulfate-free shampoos and conditioners every one to two weeks to preserve the tone. This keeps the lace soft and the knots secure for future installs.
Store on a Wig Stand
Prevent tangles and stress on the lace by storing your wig upright on a stand. Avoid tossing the wig into a drawer where the lace can get crushed or snagged. Proper storage maintains the shape and quality of your work.
Never Re-Bleach the Same Area
Repeated bleaching weakens the lace structure and drastically increases shedding risks. If knots appear dark due to product buildup, try a clarifying shampoo first. Only consider chemical touch-ups if absolutely necessary and with extreme caution.
Frequently Asked Questions About Bleaching Lace
How long should I leave bleach on lace knots?
Leave bleach on for 20 to 45 minutes, checking every 10 to 15 minutes. Stop when knots turn light brown or honey colored, not white.
Can I use purple shampoo on orange knots?
No, purple shampoo only neutralizes yellow tones. You must use blue shampoo to cancel out orange brassiness effectively.
Does bleaching lace make the wig shed more?
Proper bleaching does not cause alarming shedding if done correctly. Excessive shedding usually results from over-processing or rough handling.
What developer volume is best for beginners?
30 volume developer is the industry standard and safest choice for beginners. It offers good lift without the high risk of burning the lace.
Can I bleach my lace wig more than once?
Re-bleaching the same area is not recommended as it weakens the lace. Try deep cleaning with clarifying shampoo if knots look dark from buildup.
Key Takeaways for How to Bleach Lace Successfully
Mastering how to bleach lace transforms a basic wig into an undetectable masterpiece with practice and patience. Remember to heat train your hair, mix a thick toothpaste-like formula, and neutralize immediately after rinsing. These steps ensure your knots blend seamlessly with your skin tone without compromising durability.
Start with a small test patch if you are unsure about timing or mixture consistency. With the right technique, you can achieve a professional, salon-quality hairline from the comfort of your home.