How to Lace Work Boots
If your heels slip or your feet ache after a long shift, learning how to lace work boots correctly can solve these issues instantly. Improper lacing causes over 40% of foot injuries by creating pressure points and reducing ankle stability.
This guide details specific techniques like the heel lock and skip lacing to fix common fit problems. You will discover how to customize your boots for wide feet, high arches, or heavy-duty tactical needs.
Master the Standard Criss-Cross Lacing Method
The standard criss-cross pattern remains the most reliable choice for daily work environments. It provides balanced tension across your entire foot while remaining easy to adjust.
Why This Method Works Best
This technique distributes pressure evenly to prevent hot spots. It suits almost every boot brand from Red Wing to Timberland PRO.
Step-by-Step Execution
- Thread the lace through the bottom eyelets from the inside out.
- Pull both ends upward and cross them diagonally to the opposite side.
- Continue alternating sides while maintaining consistent tension.
- Ensure no gaps form between the lace and the boot tongue.
- Tie a secure square knot at the top eyelets.
Pro Tip: Use a lace garage if your boots have one to keep the tongue centered during movement.
Apply Inside-Out Flat Lacing for Clean Results
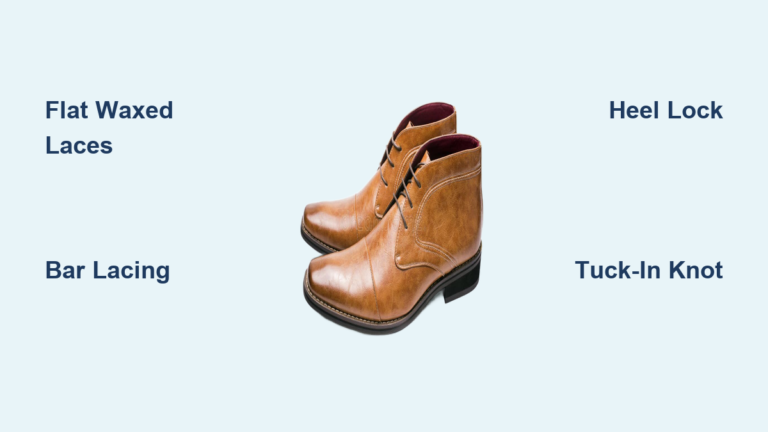
Inside-out lacing creates a professional appearance while keeping flat wax laces from twisting. This method ensures the pull direction always comes from the inside for better security.
Ideal Use Cases for Flat Wax Laces
Flat waxed laces resist fraying but twist easily if laced incorrectly. This method keeps them aligned with the boot tongue perfectly.
How to Perform Inside-Out Lacing
- Start at the bottom eyelet by threading each end from inside to outside.
- Maintain the inside-out direction at every single eyelet going up.
- Alternate left and right sides as you move toward the top.
- Pull the ends from the inside to lock your foot securely.
Visual Cue: Finished laces lie completely flat against the tongue without any kinks.
Avoid This Mistake: Starting from the outside causes laces to lift off the tongue and reduces control.
Eliminate Heel Slip with the Heel Lock Technique
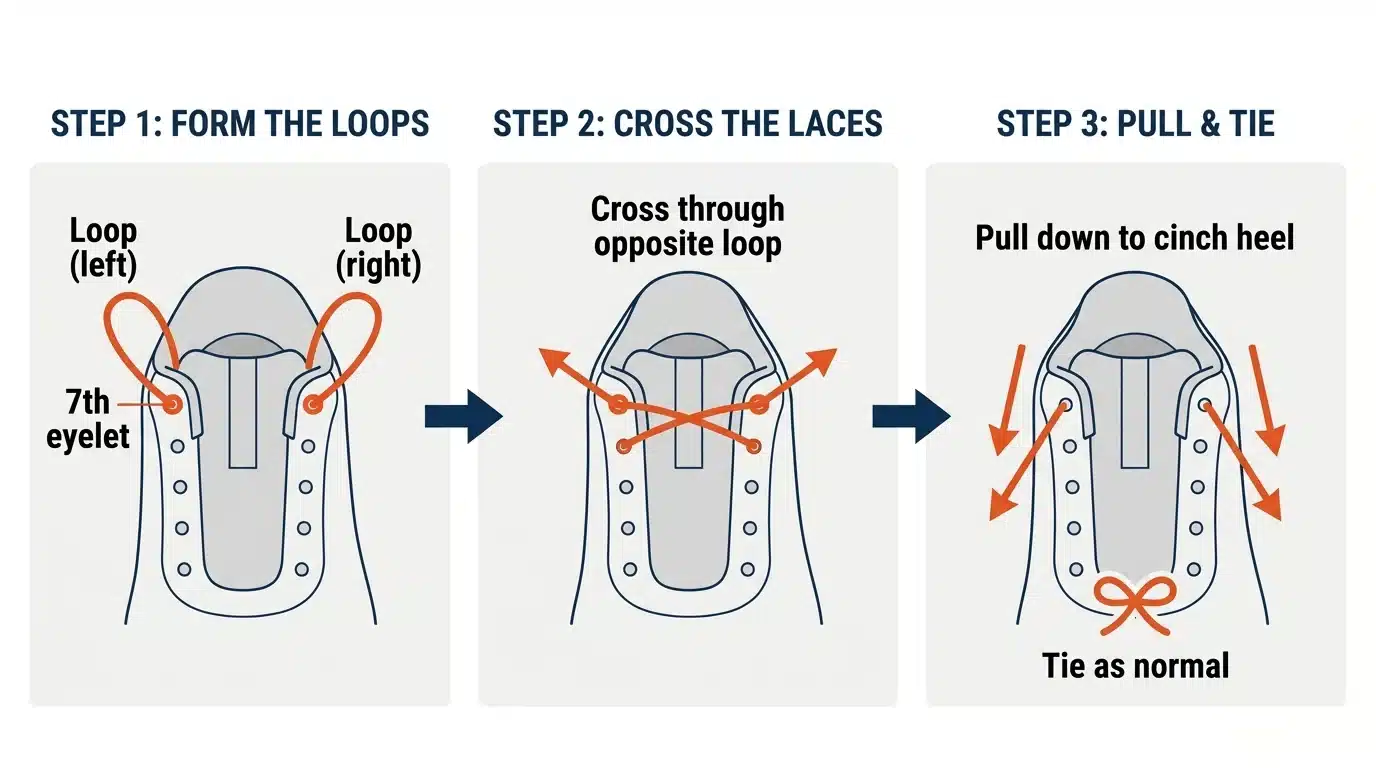
Heel slip causes blisters and reduces your control on uneven ground. The heel lock technique, also known as the runner’s loop, cinches the ankle collar tightly to stop movement.
Fix Slipping Heels Immediately
This method locks your heel in place by using the top eyelets to create a tightening loop. It is essential for workers with narrow heels or those hiking rugged terrain.
How to Apply the Heel Lock
- Lace normally using the criss-cross method up to the second-to-last eyelets.
- Thread each lace straight up through the top eyelet on the same side to form a loop.
- Cross the lace ends and feed each under the opposite loop you just created.
- Pull tight to close the collar around your ankle firmly.
- Finish with a standard square knot.
Time Required: About 30 seconds once you master the motion.
Relieve Instep Pressure with Skip Lacing
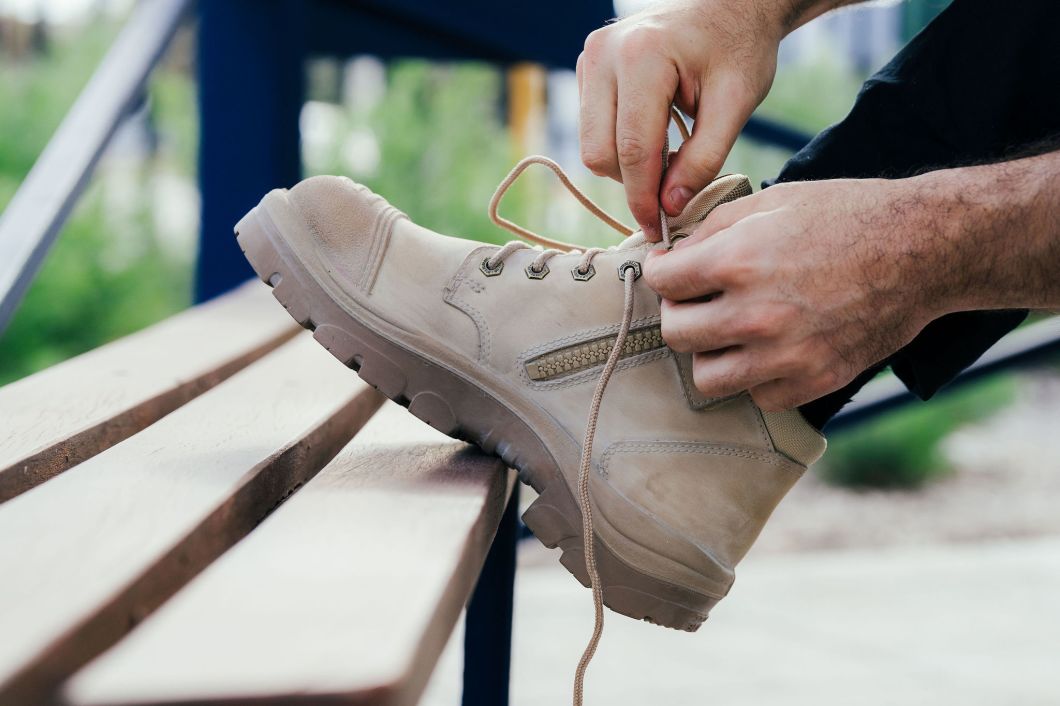
High insteps often cause pain where the lace crosses the top of the foot. Skip lacing creates a pressure-free window to relieve this specific discomfort.
Reduce Pain on the Top of Your Foot
This technique removes tension from sensitive areas without sacrificing overall boot security. It is perfect for workers with high arches or swelling during long shifts.
Step-by-Step Guide to Skip Lacing
- Begin with standard criss-cross lacing from the bottom up.
- Identify the eyelets directly over your high instep or pain point.
- Skip one or two pairs of eyelets by passing the lace straight across horizontally.
- Resume the criss-cross pattern above the gap you created.
- Tighten carefully to maintain midfoot support.
Warning: Do not skip more than two eyelet pairs or you may weaken lateral stability.
Use Ladder Lacing for Tactical Durability

Ladder lacing creates a rigid structure that resists snagging and maintains tension under heavy stress. Military and tactical personnel rely on this method for demanding environments.
Built for Heavy-Duty Applications
This pattern forms interlocking horizontal bars that will not loosen due to vibration. It works best on duty boots with close-set eyelets like 5.11 or First Tactical.
How to Build the Ladder Pattern
- Insert laces into the bottom eyelets from underneath the boot.
- Run each lace straight up the same side to the next eyelet and thread from the top.
- Cross over and feed each lace under the vertical segment on the opposite side.
- Repeat this process up the boot to create interlocking bars.
Result: A ladder-like structure that stays tight regardless of activity level.
Adjust Straight Bar Lacing for Wide Feet
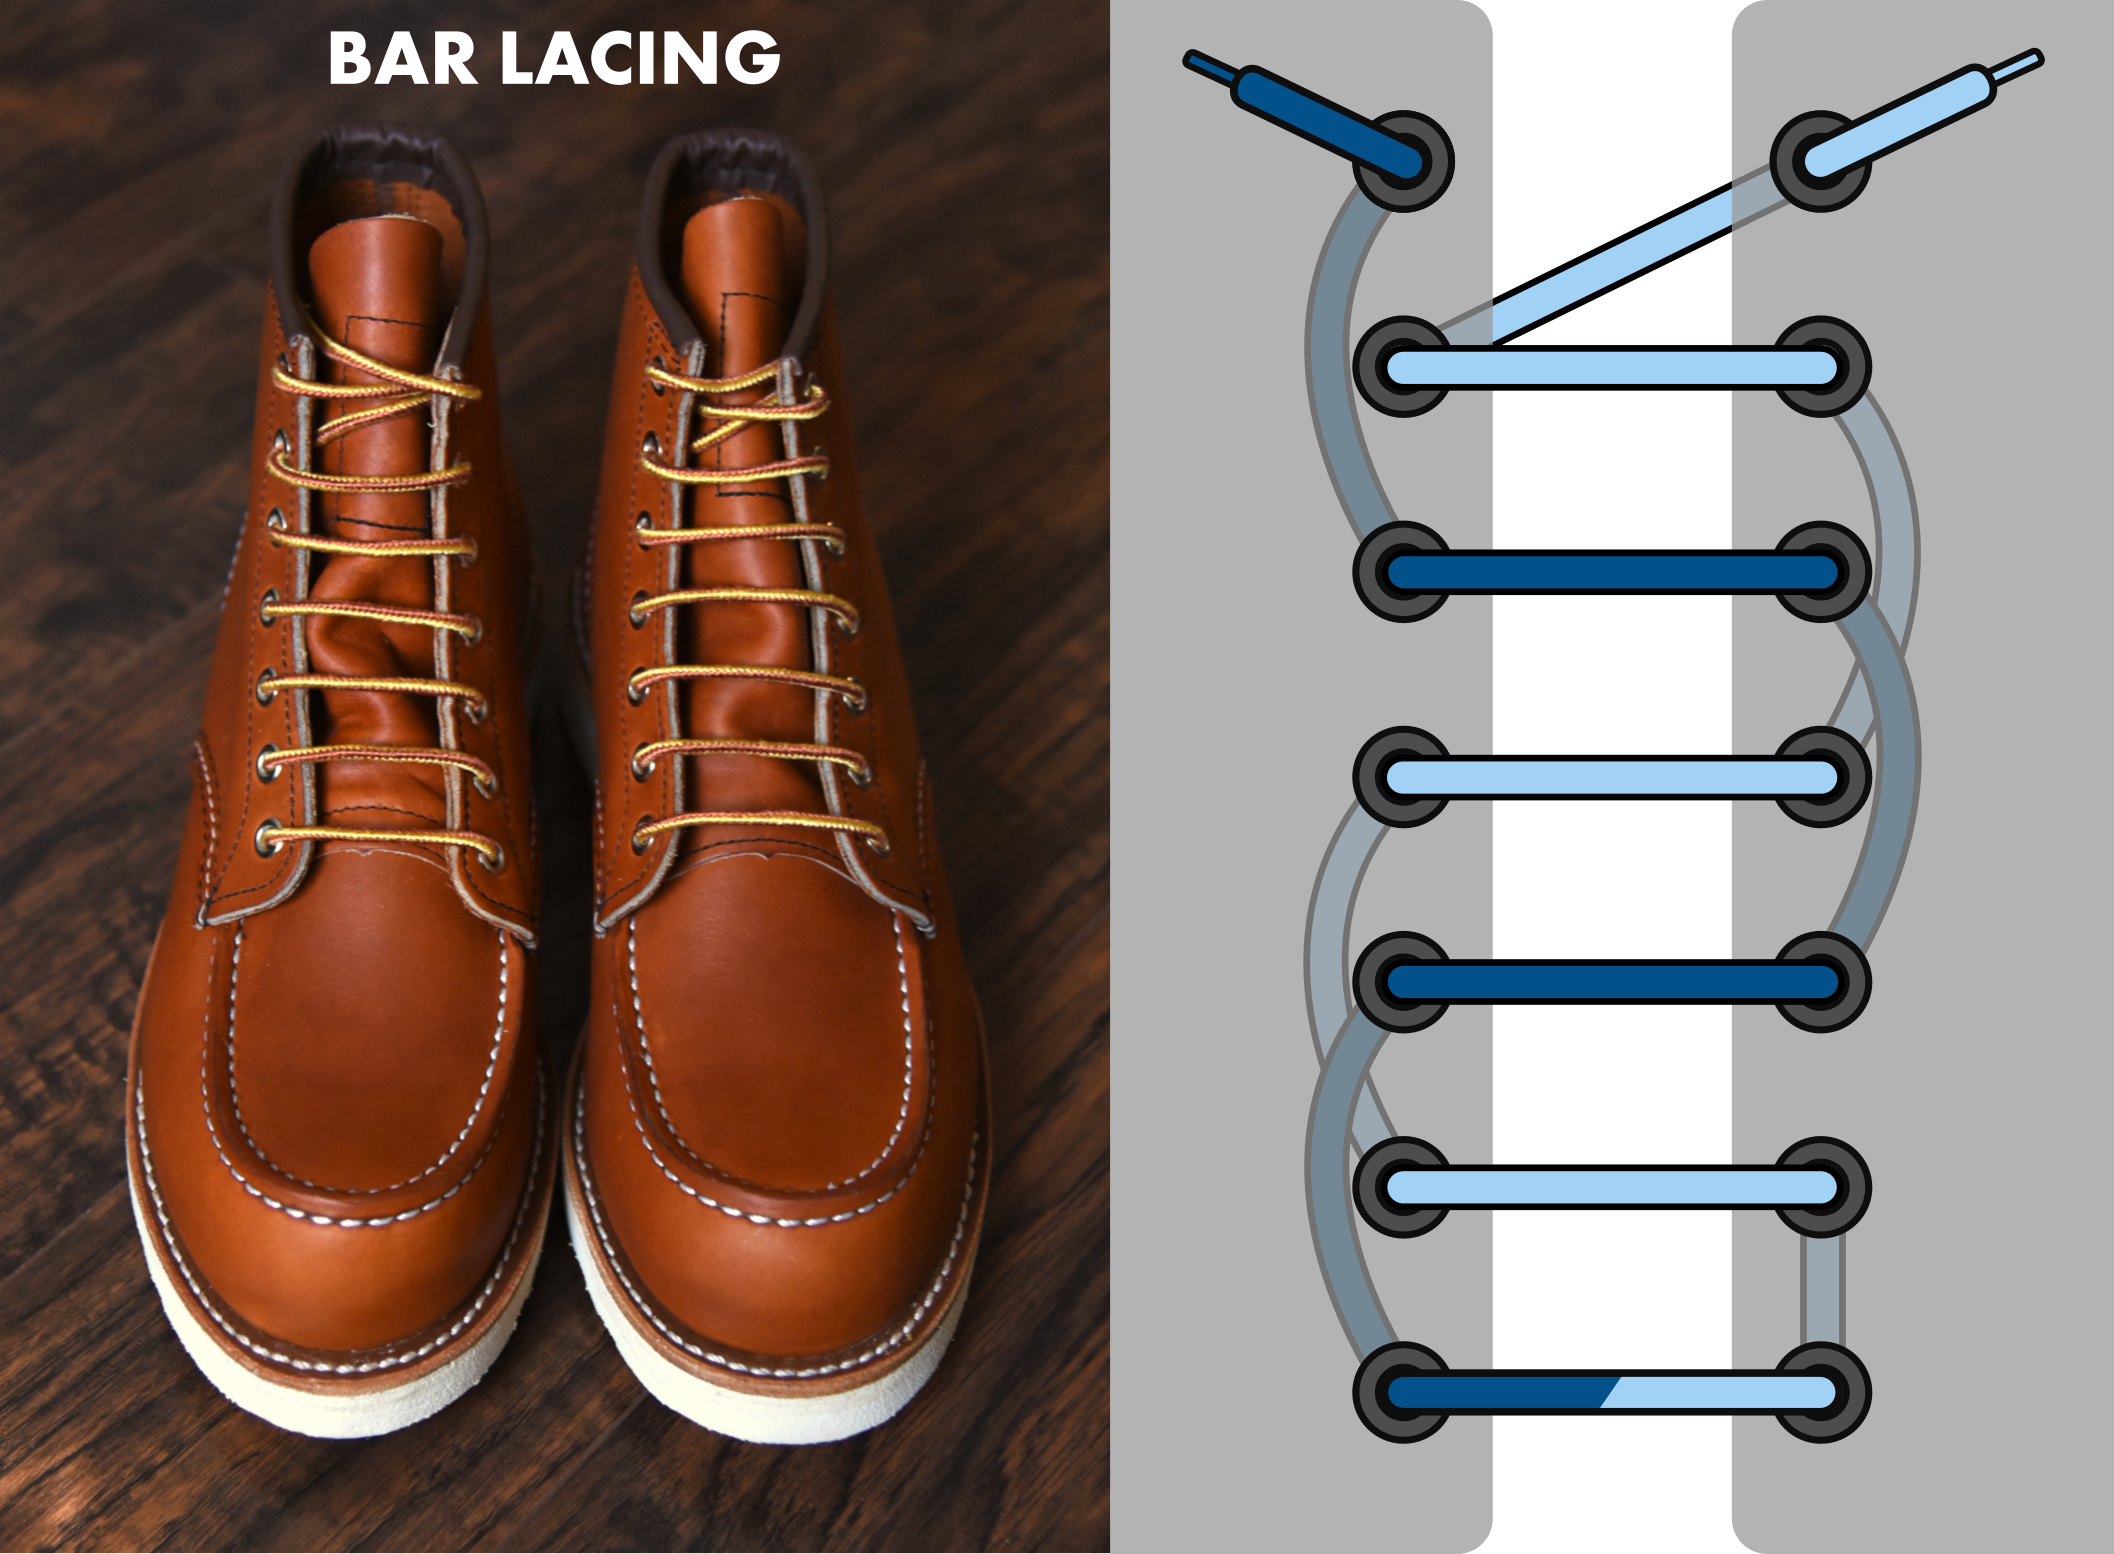
Wide feet often suffer from pinching when diagonal laces pull the boot sides inward. Straight bar lacing minimizes this diagonal pull to create more room.
Create Room for Wider Foot Shapes
This method eliminates the criss-cross pressure that squeezes wide feet across the ball. It is ideal for steel-toe boots with wide toe boxes.
How to Lace Straight Bars
- Start at the bottom by threading one end from inside out and the other from outside in.
- Run the inside lace straight across horizontally to the opposite side.
- Feed the outside lace up the same side and then under the horizontal lace.
- Alternate this pattern upward to create parallel bars.
Key Benefit: Reduces constriction across the metatarsals significantly.
Secure Laces with the Surgeon’s Knot
Standard knots often slip when you move constantly or sweat during a shift. The surgeon’s knot adds extra friction to keep your laces tight all day long.
Prevent Midday Loosening
This knot is essential for high-impact tasks or long patrols where loose laces pose a tripping hazard. It holds tension far better than a basic bow.
How to Tie a Surgeon’s Knot
- Cross the laces and form a basic loop as if starting a normal knot.
- Wrap the ends around each other twice before pulling tight.
- Pull firmly to secure the double wrap.
- Finish with a regular bow on top.
When to Use: Apply this at the top two eyelets to lock ankle support without over-tightening the forefoot.
Customize Lacing for Specific Foot Types
Your foot anatomy dictates which lacing method will provide the most comfort and safety. Matching the technique to your shape prevents injury and fatigue.
Solutions for High Arches
- Problem: Laces feel loose at the top but tight at the base.
- Solution: Combine skip lacing over the arch with a surgeon’s knot at the top.
- Bonus: Use longer laces to accommodate the extra threading needed.
Fixes for Wide Feet
- Problem: Pinching across the metatarsals causes pain.
- Fix: Use straight bar or ladder lacing to reduce inward pull.
- Avoid: Tight criss-cross patterns that narrow the boot width.
Stability for Narrow Heels
- Problem: Heel slips up and down inside the boot.
- Fix: Always use the heel lock technique to cinch the collar.
- Pro Tip: Pair this with padded ankle collars for added grip.
Select the Right Laces for Your Boots
Even the best lacing technique fails if you use poor-quality materials. Choosing the right lace type improves durability and fit retention.
Why Flat Wax Laces Are Superior
- Durability: They resist twisting and fraying better than round laces.
- Performance: They stay flat against the tongue for consistent tension.
- Sources: Brands like Shoelace.com offer excellent options.
Round vs. Flat Lace Comparison
- Round Laces: Common but prone to loosening and rolling under tension.
- Flat Wax: Provides superior grip and a cleaner professional look.
Upgrade Tip: Swap factory laces for waxed flat ones to see an immediate improvement.
Utilize All Eyelets for Maximum Safety
Never skip the top eyelet on your work boots as it is engineered for safety. Ignoring it reduces ankle stability by up to 30% and increases sprain risk.
Why the Top Eyelet Matters
- It anchors the ankle collar to prevent excessive movement.
- It prevents heel lift during climbing or walking.
- It distributes load from the calf down to the foot.
Rule of Thumb: If your current laces are too short to use the top eyelet, replace them immediately.
Adapt Lacing to Environmental Conditions
Weather and shift length affect how your feet fit inside your boots. Adjusting your lacing strategy throughout the day maintains comfort and safety.
Hot Weather Adjustments
- Feet swell in heat so loosen midfoot lacing slightly.
- Use skip lacing to relieve extra pressure on the instep.
Cold and Wet Conditions
- Wear thicker socks and re-lace to accommodate the added volume.
- Use the heel lock to prevent foot movement in damp boots.
Long Shift Strategies
- Re-tighten laces midway through the day to counteract stretching.
- Check for lace stretch especially if using cotton laces.
Perform Daily Maintenance and Safety Checks
Reliable lacing requires daily inspection to ensure your boots remain safe. Small habits prevent major injuries on the job site.
Daily Inspection Routine
- Check for frayed or cracked laces that could snap.
- Ensure eyelets are not bent or pulling loose from the leather.
- Confirm knots hold tight after ten minutes of walking.
Re-Lacing Frequency
- Replace laces every 3 to 6 months or when wear appears.
- Change laces after significant boot flexing such as crawling.
Injury Prevention Recap
- Heel slip leads to blisters and infection risk.
- Uneven tension causes pressure sores and reduced mobility.
- Loose fit results in instability and potential falls.
Quick Method Selection Guide

| Goal | Best Lacing Method |
|---|---|
| General daily use | Standard Criss-Cross |
| Heel slipping | Heel Lock (Runner’s Loop) |
| High instep pain | Skip Lacing |
| Wide feet | Straight Bar or Ladder |
| High arches | Surgeon’s Knot + Skip Lacing |
| Tactical durability | Ladder Lacing |
| Clean professional look | Inside-Out with Flat Wax Laces |
| Long shifts | Surgeon’s Knot finish |
Frequently Asked Questions About Work Boot Lacing
How do I stop my heels from slipping in work boots?
Use the heel lock technique by looping laces through the top eyelets on the same side. This creates a secure collar that locks your heel in place and prevents blisters.
What is the best lacing method for wide feet?
Straight bar lacing or ladder lacing works best because it reduces diagonal pressure. These methods allow your foot to expand naturally without constriction across the ball.
Why do my work boot laces keep coming undone?
Switch to a surgeon’s knot which involves wrapping the laces twice before tightening. Using flat wax laces also provides more friction than standard round laces to prevent slipping.
How can I relieve pressure on the top of my foot?
Try skip lacing by leaving out one or two eyelets over the painful area. This creates a pressure-free window while maintaining support above and below the spot.
Should I use all the eyelets on my work boots?
Yes, using all eyelets including the top one is critical for ankle stability. Skipping the top eyelet reduces the engineered safety features of the boot significantly.
Key Takeaways for Lacing Work Boots Safely
Properly lacing your work boots prevents over 40% of foot and ankle injuries by ensuring a secure fit. Techniques like the heel lock and skip lacing address specific issues like slipping or high arches effectively.
Choose flat wax laces and utilize every eyelet to maximize the safety features of your footwear. Start applying these methods today to transform your comfort and stability on the job.